That foul smell from your compost isn’t a sign of failure; it’s a specific diagnostic signal. An ammonia odour points to an excess of nitrogen (too many ‘greens’ like kitchen scraps), while a slimy texture indicates a lack of oxygen, causing anaerobic rot. The cure isn’t just turning it, but correcting your compost’s ‘diet’ by adding carbon-rich ‘browns’ like cardboard to restore balance and enable proper decomposition, especially in the damp UK climate.
The moment a gardener lifts the lid of their compost bin and is hit by a pungent smell of ammonia or a wave of rotten-egg sourness is a disheartening one. You see a slimy, wet, black mess instead of the promised ‘black gold’. For many beginners in the UK, this is the point of failure, the moment they believe composting is “too complicated” and give up. The common advice to “just turn it” or “let it be” often misses the crucial point: your compost isn’t just failing, it’s communicating.
Most guides offer generic tips, but they fail to address the specific challenges of the British climate, where dampness is a constant battle. They tell you what to do, but not why. They don’t teach you to become a ‘compost doctor’, capable of diagnosing the symptoms. Is it a dietary issue, a breathing problem, or an external contamination? Understanding the science behind the smell is the key to transforming that stinking mess into a thriving, sweet-smelling ecosystem that produces beautiful, crumbly compost.
This guide moves beyond platitudes. We will diagnose the specific signals your compost is sending you. We’ll establish the correct ‘diet’ of carbon and nitrogen, tackle common invaders like rats, and even explore advanced techniques like Bokashi for cooked food. We will equip you with the diagnostic tools to not just fix your current problem, but to prevent it from ever happening again, turning your compost heap into the resilient heart of your garden.
To help you navigate these corrective measures, this article breaks down the most common composting ailments and their cures. Follow this guide to transform your compost from a problem-point to a productive powerhouse.
Summary: A Diagnostic Guide to Common Composting Failures
- Why You Need to Add Cardboard to Your Kitchen Scraps to Stop the Rot?
- How to Stop Rats Nesting in Your Warm Compost Heap in Winter?
- Hot Bin vs Dalek: Is It Worth Paying £200 to Compost Fast?
- The Manure Mistake: How to Test for Weedkiller Before Mulching Roses?
- How to Compost Cooked Food and Meat Scraps Using Bokashi?
- The Pizza Box Mistake That Ruins an Entire Recycling Truck
- How to Make Perfect Leaf Mould to Replace Peat in Your Potting Mix?
- Why is Mulching the Single Most Important Job for Resilience in UK Gardens?
Why You Need to Add Cardboard to Your Kitchen Scraps to Stop the Rot?
The strong smell of ammonia is the most common symptom of a compost heap in distress. This is a direct diagnostic signal: your compost’s ‘diet’ is dangerously out of balance. It’s suffering from an overdose of nitrogen-rich ‘green’ materials, such as kitchen vegetable scraps, coffee grounds, and grass clippings. When there isn’t enough carbon-rich ‘brown’ material to balance this nitrogen, the excess is released as ammonia gas, creating the signature foul smell. The slimy texture is a related symptom; the dense, wet greens have compacted, squeezing out air and causing the pile to “drown.” This creates an anaerobic environment (lacking oxygen), where putrefaction, not composting, occurs.
The prescription is simple: you must increase the carbon in the mix. Cardboard and paper are a perfect, readily available source of carbon for the home composter. They act like a sponge, soaking up excess moisture, and their structure creates essential air pockets that allow the pile to breathe. As compost expert Charles Dowding highlights for UK conditions, managing moisture is key. He explains that excess water is a primary cause of anaerobic conditions, making a cover essential. He advises, “In the UK, water is often changing aerobic composting to anaerobic, by excluding air. Anaerobic compost is black rather than dark brown, more smelly and less crumbly. Hence a polythene sheet over heaps is worthwhile to keep rain off – to keep air in, not for preventing leaching!”
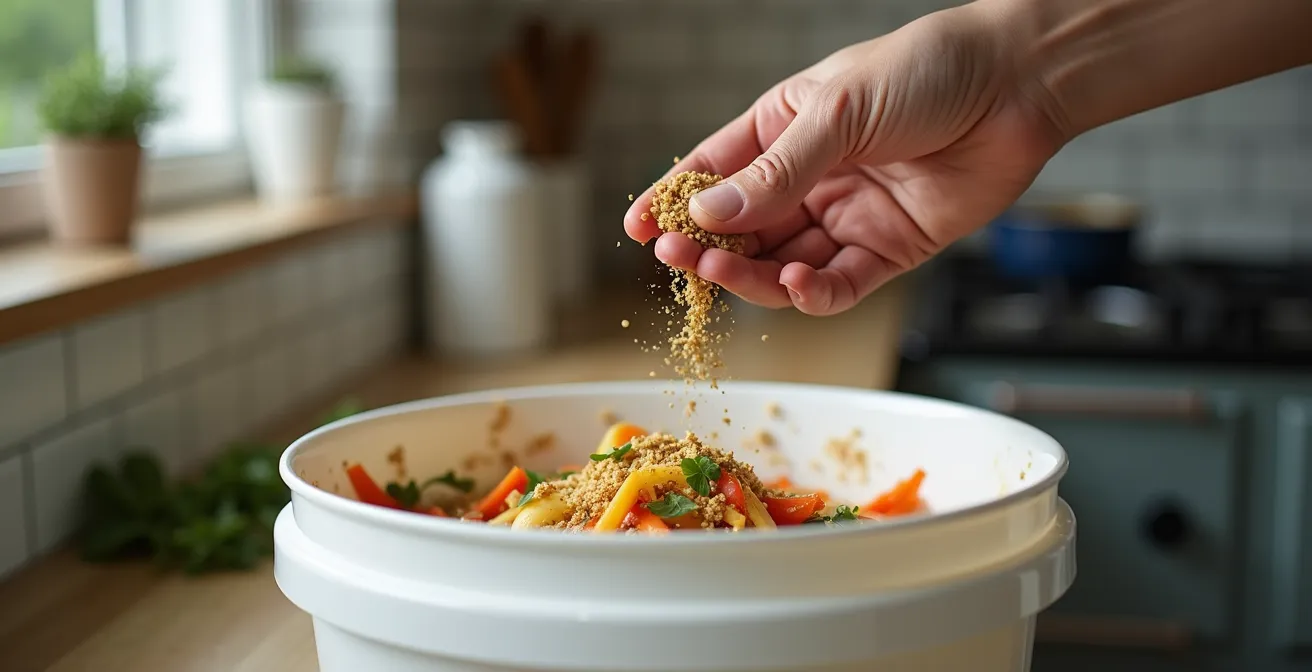
The ideal compost ‘diet’ is a Carbon-to-Nitrogen (C:N) ratio of roughly 50:50 by volume. This means for every bucket of kitchen scraps you add, you should add a roughly equal volume of torn-up cardboard, toilet roll tubes, or dry leaves. This rebalances the chemistry, stops the ammonia smell, and provides the structure for air to circulate, curing the slime and enabling beneficial aerobic bacteria to thrive.
By treating cardboard not as waste but as a vital ‘ingredient’, you fundamentally solve the most common composting failure. It’s the difference between a soggy, smelly mess and a sweet, earthy-smelling heap working its magic.
How to Stop Rats Nesting in Your Warm Compost Heap in Winter?
Finding evidence of rats in your compost heap can be deeply unsettling. It’s important to diagnose why they are there in the first place. Rats are seeking two things: a food source and, especially in the cold UK winter, a warm, sheltered place to nest. A healthy, active compost heap that is breaking down organic matter efficiently can generate significant heat. Indeed, some UK composters report maintaining temperatures between 60-70°C, creating a very attractive winter residence for rodents.
The first line of defence is to manage what you add. Avoid composting cooked food, meat, fish, dairy, or oily waste in an open or standard ‘Dalek’ style bin, as these are powerful attractants. However, the most effective solution is physical exclusion. Rats are adept climbers and burrowers, so simply placing a lid on top is not enough. You must fortify the base of your compost bin. A simple and highly effective method for the common plastic bins supplied by councils is to place them on a layer of fine, sturdy wire mesh (6mm squares are ideal) before you start filling them. This prevents rats from burrowing up from underneath.
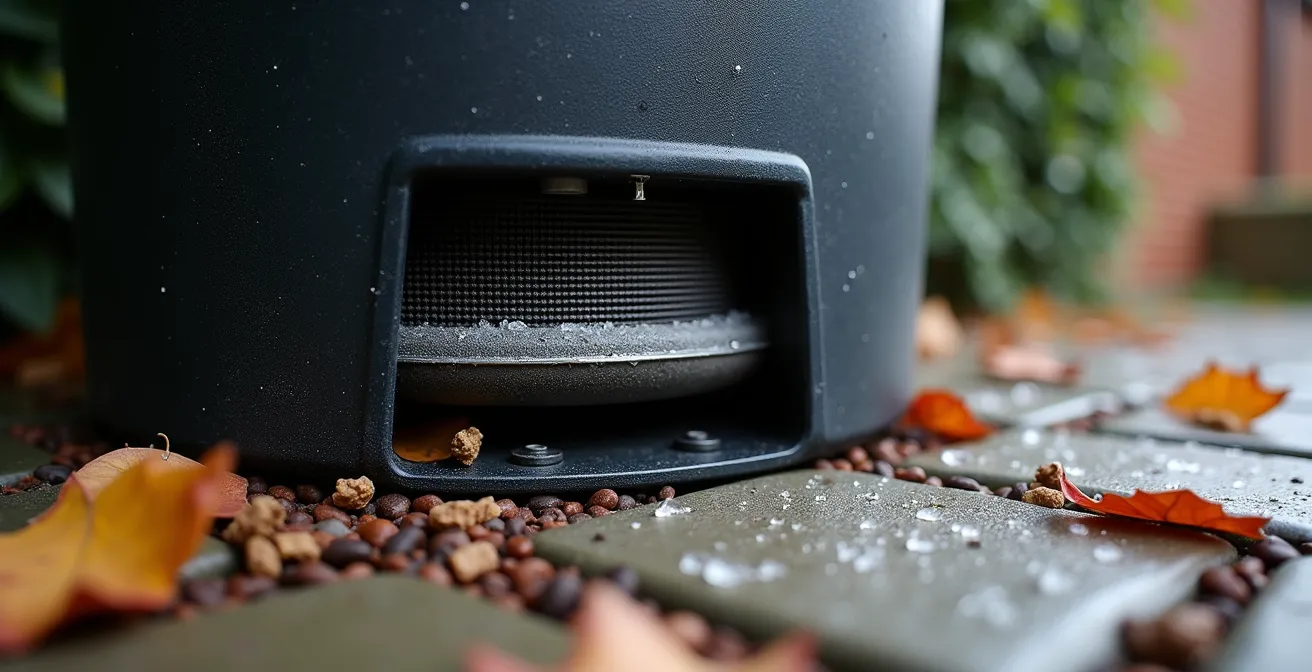
As the image shows, ensuring the bin is securely seated on the mesh is critical. You can weigh the mesh down with bricks around the outside edge to prevent any gaps from appearing. Furthermore, maintain a clean area around your compost bin, removing any overgrown weeds or debris that could provide cover for approaching rodents. Turning the pile regularly can also disturb any potential nesting sites, but prevention through proper food management and physical barriers is by far the most effective and permanent cure.
By making your compost bin an impregnable fortress, you remove the ‘shelter’ part of the attraction, significantly reducing the likelihood of unwanted winter guests without resorting to traps or poisons.
Hot Bin vs Dalek: Is It Worth Paying £200 to Compost Fast?
For many gardeners frustrated by the slow pace of traditional composting and its limitations, the market offers a more intensive treatment: hot composting bins. In the UK, this often comes down to a choice between the standard, council-subsidised ‘Dalek’ bin and a high-performance insulated system like a HotBin. The question is, does the significant price difference—often over £200—justify the investment? The answer depends on your specific needs, space, and how much waste you generate.
A standard black Dalek bin is a passive, cold composting system. It works, but it’s slow, typically taking 6-12 months to produce usable compost, and it slows down dramatically or stops completely in winter. It’s also not suitable for cooked food, which can attract vermin. A HotBin, by contrast, is an insulated system that acts like a compost ‘incubator’. It traps the heat generated by microbial activity, accelerating the process to produce compost in just 30-90 days. This elevated temperature also allows it to safely break down all food waste, including cooked leftovers, meat, and bones.
The financial case for a hot bin can be compelling if you currently pay for a garden waste collection service. By processing all your garden and food waste on-site, you can eliminate this annual fee, leading to a payback period of just a few years. The following analysis, based on data from HotBin Composting, highlights the key differences.
| Feature | Council Dalek Bin | HotBin 200L |
|---|---|---|
| Initial Cost | £25-£40 (subsidised) | £242.99 (2024 price) |
| Time to Compost | 6-12 months | 30-90 days |
| Annual Output | 200L | 800L |
| Council Garden Waste Fee Saved | £0 | £60-£96/year |
| Can Process Cooked Food | No | Yes |
| Winter Performance | Slows/stops | Continues at 40-60°C |
| Payback Period | Immediate | 2.5-4 years |
If you have a small garden, produce little waste, and are patient, a Dalek is perfectly adequate. But if you have a larger garden, a family that generates significant food waste, and you want to eliminate council fees while producing large volumes of high-quality compost quickly, a HotBin can be a very sound long-term investment.
The Manure Mistake: How to Test for Weedkiller Before Mulching Roses?
Adding well-rotted manure to your garden is a classic way to enrich the soil. However, a hidden danger is increasingly causing devastation in UK gardens: persistent herbicide contamination. Specifically, chemicals like aminopyralid, used legally on agricultural grasslands to kill broadleaf weeds, can pass through an animal’s digestive system and remain active in its manure for months, or even years. When this contaminated manure is used as a mulch on sensitive plants like roses, beans, potatoes, and tomatoes, it can cause stunted growth, curled leaves, and poor yields.
The symptoms can be easily mistaken for a nutrient deficiency or disease, leading to incorrect treatment. Because the chemical is invisible and odourless, you cannot tell if a batch of manure is contaminated just by looking at it. Therefore, before spreading any non-certified manure across your precious beds, it is absolutely essential to perform a ‘bioassay’—a simple biological test—to screen for contamination. The most reliable method for home gardeners is the broad bean test.
This test uses broad beans as an ‘indicator species’ because they are highly sensitive to aminopyralid-type herbicides. By comparing the growth of beans in your regular compost with those in the suspect manure, you can get a clear visual diagnosis within a few weeks. If the manure is contaminated, the test plants will show tell-tale signs of distress.
Your Action Plan: The Broad Bean Test Protocol for UK Gardeners
- Week 1: Prepare Samples. Fill 3 pots with the suspect manure mixed 50/50 with your regular multi-purpose compost. Fill 3 identical ‘control’ pots with only the multi-purpose compost.
- Week 1: Plant Seeds. Sow 2-3 broad bean seeds in each of the six pots. Water all pots equally and place them in the same location to ensure identical growing conditions.
- Week 2-3: Monitor Germination. Observe the germination rates and initial growth. Early signs of trouble may already be visible.
- Week 3-4: Diagnose Symptoms. Carefully inspect the leaves of the ‘test’ plants. Look for classic signs of aminopyralid damage: leaf curling (leaves cupping upwards or downwards), fern-like growth, or pale, elongated stems compared to the healthy control plants.
- Week 4: Quarantine if Positive. If the test plants show any deformities while the control plants are healthy, the manure is contaminated. Do not use it. It must be quarantined in a separate heap for at least 12-18 months to allow the chemical to break down.
Spending a few weeks on this preventative test can save you from a full season of heartache and the difficult, long-term task of remediating contaminated soil. It is a small investment of time for invaluable peace of mind.
How to Compost Cooked Food and Meat Scraps Using Bokashi?
One of the golden rules of traditional composting is to never add cooked food, meat, dairy, or fish. These materials are notorious for creating foul odours and, most importantly, attracting vermin like rats and foxes. For many households, this means a significant portion of their food waste still ends up in the general waste bin. However, a clever Japanese method called Bokashi offers a perfect solution, acting as a pre-treatment that allows you to safely add these materials to your regular UK compost bin.
Bokashi isn’t technically composting; it’s a fermentation (or ‘pickling’) process. It uses a specialised, airtight bucket and an inoculant bran, rich in beneficial microbes. You simply layer your kitchen scraps (including meat, small bones, and cooked leftovers) in the bucket, sprinkling the bran over each layer. Once full, the bucket is sealed and left to ferment for a couple of weeks. This process doesn’t break the food down into soil; instead, it pre-digests it and neutralises the odours that attract pests. The “pickled” waste has a sweet, vinegary smell that is unappealing to rodents.
Once the fermentation is complete, you can safely bury the contents in your main compost heap. As described in a case study on integrating this method, “Bokashi bins are a different kind of magic – they kind of pickle the food waste meaning that you can then put kitchen waste in a regular compost bin.” This two-step process effectively bridges the gap between your kitchen and your garden compost. The fermented material breaks down incredibly quickly once added to the main heap, supercharging the microbial activity without the associated risks of odours or pests, a common issue in UK suburban gardens.
By adopting the Bokashi system, you can effectively compost 100% of your food waste, dramatically reducing what goes to landfill and creating an even richer final compost for your garden.
The Pizza Box Mistake That Ruins an Entire Recycling Truck
The greasy pizza box is a classic recycling conundrum. Many people, wanting to do the right thing, toss the entire box into their recycling bin. Unfortunately, this well-intentioned act can have disastrous consequences. The grease and food residue from the pizza contaminates the cardboard, making it impossible to recycle. During the pulping process, oil and paper fibres don’t mix. The grease creates spots and holes in the new paper product, rendering it useless. A single greasy pizza box can contaminate an entire batch of paper recycling, potentially forcing a whole truckload to be diverted to landfill or incineration.
However, throwing the whole box in the general waste isn’t the best answer either. Most of the box—the clean top half—is perfectly good cardboard. This is a valuable ‘brown’ material for your compost heap. The solution is simple but requires a moment of diagnosis: split the box. The clean, non-greasy lid can be torn into strips and added to your compost bin, providing much-needed carbon to balance your wet kitchen scraps. The greasy bottom part, unfortunately, must go into your general waste.
This simple act of separating the two halves maximises resource recovery. You get valuable material for your garden while preventing contamination of the public recycling stream. Before you do anything, however, it’s vital to check your local council’s specific rules, as guidelines can vary.
Your Action Plan: The UK Pizza Box Decision Tree
- Step 1: Check Local Rules. First and foremost, visit your local council’s website or use recyclenow.com with your postcode to confirm their specific guidance on pizza boxes.
- Step 2: Perform the ‘Grease Test’. Examine the box. If oil has soaked through the cardboard from the base to the lid, the whole thing is contaminated.
- Step 3: Tear the Box. If the lid is clean, tear the box in half along the centre fold. This is your point of separation.
- Step 4: Compost the Clean Half. Tear the clean lid into hand-sized strips and add it to your compost bin. It’s an excellent source of ‘brown’ material.
- Step 5: Bin the Greasy Half. The greasy base must go into your general waste bin to prevent contamination of the paper recycling stream.
By taking 30 seconds to make this decision, you contribute positively to both your garden’s ecosystem and the national recycling effort, avoiding a common but costly mistake.
How to Make Perfect Leaf Mould to Replace Peat in Your Potting Mix?
As UK gardeners move away from peat-based composts to protect our vital peatland ecosystems, finding sustainable, high-quality alternatives is paramount. The UK government’s ban on peat for amateur use is a driving force in this transition. Indeed, we are fast approaching the UK government’s target for 2024 for gardeners to switch to peat-free alternatives. One of the best, and completely free, alternatives is leaf mould. This dark, crumbly, nutrient-rich material is the product of slowly decomposed leaves and is a superb soil conditioner and a key ingredient for homemade potting mixes.
Unlike regular composting, which involves a hot mix of greens and browns, making leaf mould is a slow, cool, fungal process. It couldn’t be simpler: all you need are fallen leaves and patience. While you can build a large, dedicated cage for leaves, this is often impractical in smaller UK gardens. A far more space-efficient method is to use strong bags. As the Eden Project suggests, “If you have large amounts of leaves, you might prefer to place them in a large biodegradable leaf bag.” For many, simply repurposing old council recycling bags or durable bin liners works perfectly.
The process is straightforward. In autumn, gather fallen leaves—a mix of species is great, but any will do. Avoid evergreen and conifer needles, as they are very slow to break down. Moisten the leaves if they are very dry, pack them tightly into your bags, and poke a few holes in the sides with a garden fork to allow for some air and moisture. Then, simply tuck the bags away in a shady corner of the garden and forget about them. In 12 to 18 months, the fungi will have worked their magic, transforming the leaves into a fine, dark, and crumbly leaf mould. A two-year-old mould is even finer and perfect for seed-sowing mixes.
By transforming autumn’s “waste” into a precious resource, you not only create a superior soil amendment for free but also play a direct role in protecting the UK’s fragile and irreplaceable peatland habitats.
Key Takeaways
- An ammonia smell means too much nitrogen (‘greens’); the cure is adding carbon (‘browns’) like cardboard.
- A slimy texture means your pile is anaerobic (lacking oxygen); adding bulky browns creates air pockets.
- Prevent rats by not adding cooked food to basic bins and securing the base with wire mesh.
- Test any unknown manure for herbicide contamination with a simple broad bean test before using it.
Why is Mulching the Single Most Important Job for Resilience in UK Gardens?
After diagnosing and curing your compost’s ailments, you are left with the wonderful end-product: rich, dark, crumbly compost. Now comes the most important part—using it effectively. While digging it into the soil is beneficial, applying it as a mulch is arguably the single most impactful action you can take to build resilience in your garden, especially given the UK’s changing climate. As a recent Met Office climate report highlights, “Mulching helps gardens cope with the increasingly common English weather pattern of long dry spells followed by intense downpours.”
Applying a thick layer (5-10cm) of your homemade compost or leaf mould over the surface of your soil beds in autumn or spring acts as a protective blanket. This ‘armour’ performs several critical functions simultaneously. Firstly, it suppresses weeds, saving you hours of back-breaking work. Secondly, it insulates the soil, keeping it cooler in summer and warmer in winter, protecting plant roots from stress. Most importantly, it dramatically improves water management. The mulch layer reduces evaporation from the soil surface during dry spells, keeping moisture where plants need it. When heavy rain does arrive, it intercepts the force of the downpour, preventing soil erosion and compaction, and allowing the water to soak in slowly rather than running off.
Over time, worms and other soil life will draw this organic matter down into the soil, continuously improving its structure, fertility, and water-holding capacity. You are not just feeding your plants; you are feeding the entire soil ecosystem. Given that WRAP estimates that only 3% of UK household food waste is currently home-composted, every gardener who closes this loop and uses the result as mulch is making a significant local impact. It is the ultimate act of recycling, turning waste into resilience.
By making mulching a routine job, you are future-proofing your garden, creating a low-maintenance, water-wise, and robust ecosystem that can better withstand the climatic challenges ahead.
Frequently Asked Questions About Composting Contaminants
Why is aminopyralid contamination common in UK manure?
Aminopyralid herbicides are licensed for use on UK agricultural grassland to control broadleaf weeds like docks and thistles. The chemical is effective but can persist through the digestive system of livestock that graze on treated pasture or eat hay made from it, and it remains active in their manure.
Which UK suppliers are considered safer?
While no source is 100% guaranteed without a test, manure from organic-certified farms is a much safer bet as they are prohibited from using such persistent herbicides. Suppliers participating in the PAS100 compost certification scheme also have stricter controls and testing protocols in place.
How long does aminopyralid persist in manure?
The breakdown time varies significantly with conditions. In a cool, dry, and undisturbed manure pile under typical UK conditions, aminopyralid can remain active and harmful to sensitive plants for 12 to 24 months, and in some cases, even longer.