The core problem with peat-free compost isn’t that it’s ‘bad’; it’s that its physical structure and biological instability require a completely different management approach from traditional peat.
- Peat-free mixes suffer from poor water distribution (dry below, wet on top) and rapid nutrient depletion due to “nitrogen drawdown” from undecomposed wood fibre.
- This moist, unstable environment creates a perfect breeding ground for pests like fungus gnats and leads to weak, yellowing seedlings if not managed proactively.
Recommendation: Stop treating peat-free compost like soil. Adopt a ‘hydroponic mindset’—providing precise water and nutrients on a strict schedule—to compensate for the material’s lack of natural buffering capacity.
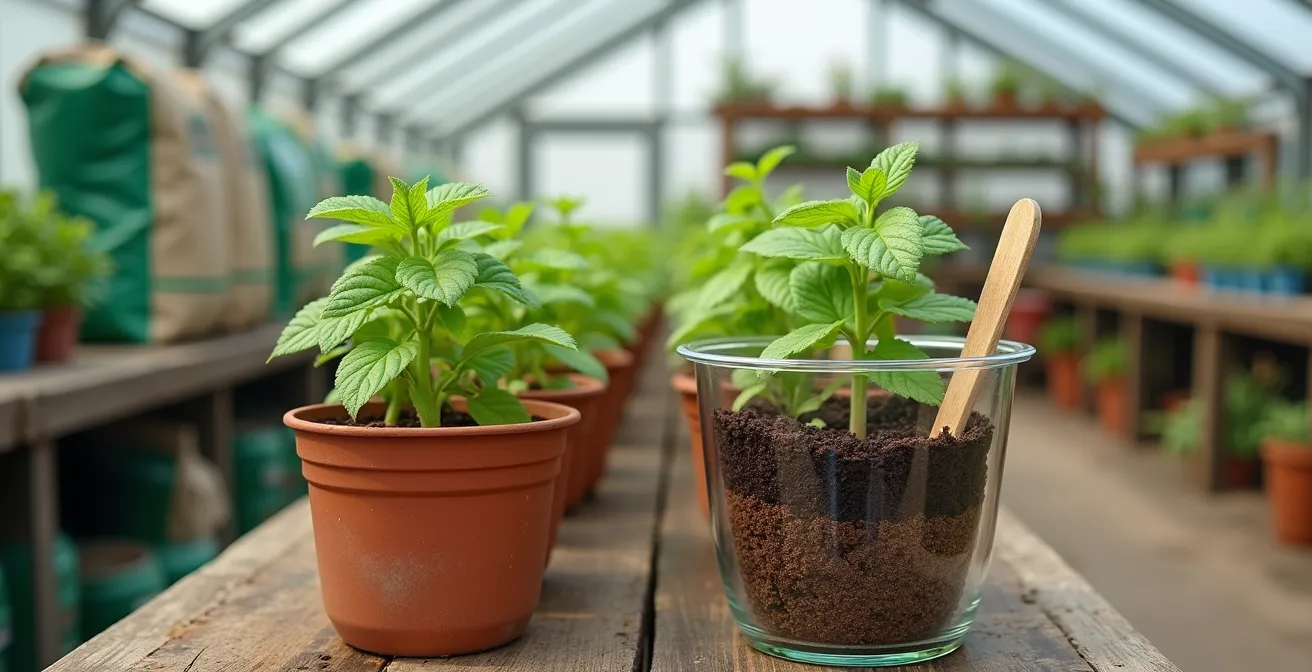
The switch to peat-free compost is a critical step for UK horticulture, a necessary move to protect our vital natural habitats. After all, a report from The Wildlife Trusts highlights that an astounding 3.2 billion tonnes of carbon are stored in the UK’s peatlands, and their preservation is non-negotiable for climate stability. Yet, for many gardeners across England, this ecological victory has felt like a personal defeat. You follow the old rules, but your seedlings are yellow, your pots are plagued by tiny black flies, and the compost itself seems to defy logic—crusted and dry on top, yet a soggy mess below.
The common advice to “water carefully” or “feed more” often feels vague and unhelpful. These tips treat the symptoms, not the underlying cause. The frustration is real, and it stems from a fundamental misunderstanding. Peat was a forgiving, stable, and consistent medium. Modern peat-free alternatives, often based on coir, wood fibre, and green compost, are anything but. They are physically and biologically dynamic systems that are still in the process of breaking down.
The secret to success is not to find a “perfect” bag of compost, but to change your entire mindset. If you stop thinking of your pot as a miniature, self-sustaining garden and start managing it as an unstable, living hydroponic system, everything changes. This means taking direct control of its physical structure, water-holding capacity, and nutrient cycle from the very first day. It requires a more technical, hands-on approach, but one that puts you back in control.
This guide will deconstruct the common failures associated with peat-free compost. We will explore the science behind why these mixes behave so differently and provide you with the technical solutions and management strategies needed to turn your frustration into success. From mastering water to balancing nutrients, you’ll learn how to work with these new materials, not against them.
Summary: Mastering the New Rules of Peat-Free Gardening
- Why Does Peat-Free Compost Look Wet on Top but Dry underneath?
- When to Start Liquid Feeding Plants Grown in Coir or Wood Fibre?
- Coir vs Green Waste: Which Peat Alternative Is Best for Seeds?
- The Fungus Gnat Plague: Why Are They Worse in Peat-Free Mixes?
- How to Make Perfect Leaf Mould to Replace Peat in Your Potting Mix?
- Why You Need to Add Cardboard to Your Kitchen Scraps to Stop the Rot?
- How to Strip Soil Nutrients Before Sowing Wildflowers?
- Why Does Your Compost Bin Smell Like Ammonia and Slime?
Why Does Peat-Free Compost Look Wet on Top but Dry underneath?
This baffling phenomenon is one of the most common frustrations with peat-free composts, particularly those high in wood fibre and bark. The cause lies in the material’s physical properties: a combination of hydrophobia and structural collapse. Unlike the uniform sponge-like structure of peat, wood-based mixes consist of particles of varying sizes. When you water, the fine particles can wash down and clog the interstitial spaces in the lower layers, creating a dense, poorly aerated zone. Meanwhile, the larger, coarser fibres at the surface dry out quickly and can become hydrophobic, actively repelling water.
This creates a crust that looks damp from a light watering but prevents moisture from penetrating to the root zone, which remains dangerously dry. Sticking a finger an inch deep is no longer a reliable test. The pot feels deceptively light, tricking you into watering again, which only exacerbates the waterlogging at the bottom and the dryness in the middle. This leads to root suffocation and plant death, even when the surface looks moist. Mastering watering in this new medium requires abandoning surface-level observation and adopting more diagnostic techniques.
The key is to assess moisture throughout the entire pot profile. The “Chopstick Test” is a far superior method:
- Push your finger 2-3cm into the compost surface to feel beneath the dry crust.
- Insert a wooden chopstick or dowel deep into the pot (10-15cm) and leave for 30 seconds.
- Remove and check: a dry stick means water is desperately needed, while a damp stick indicates moisture is present below.
- For smaller pots, lifting them to gauge weight is still a valid technique: heavy means water is present, light needs watering.
- Always check compost daily during warm weather, as the surface of peat-free mixes can dry with alarming speed.
- If a crust has formed, gently break it up with your fingers before watering to improve penetration.
Ultimately, overcoming this watering challenge is the first step in adopting the ‘hydroponic mindset’—you are the sole regulator of the root environment, and your tools must be more precise than they were with forgiving peat.
When to Start Liquid Feeding Plants Grown in Coir or Wood Fibre?
The simple answer is: almost immediately. Waiting for seedlings to show signs of yellowing is waiting too long. This necessity stems from two factors: the inherent low nutrient content of base materials like coir and the biological process of nitrogen drawdown. Many peat-free composts contain a high proportion of carbon-rich, un-decomposed organic matter, such as wood fibre or bark. The microorganisms that work to break down this material require nitrogen to fuel their activity, and they pull this vital nutrient directly from the compost, effectively ‘robbing’ it from your plants’ roots.
This process is why young plants that start off strong can suddenly stall and turn a pale, sickly yellow. They are being starved of nitrogen at a critical growth stage. Unlike peat, which holds onto nutrients, these mixes have a very low buffering capacity. The initial fertiliser charge included by the manufacturer can be minimal or can leach out quickly. Groundbreaking research has quantified this effect; a 2024-2025 trial at the Stockbridge Technology Centre found that adding fertiliser before planting reduced failure rates in peat-free composts from 40% to just 6%. This confirms that early and consistent liquid feeding is not optional; it is fundamental to success.
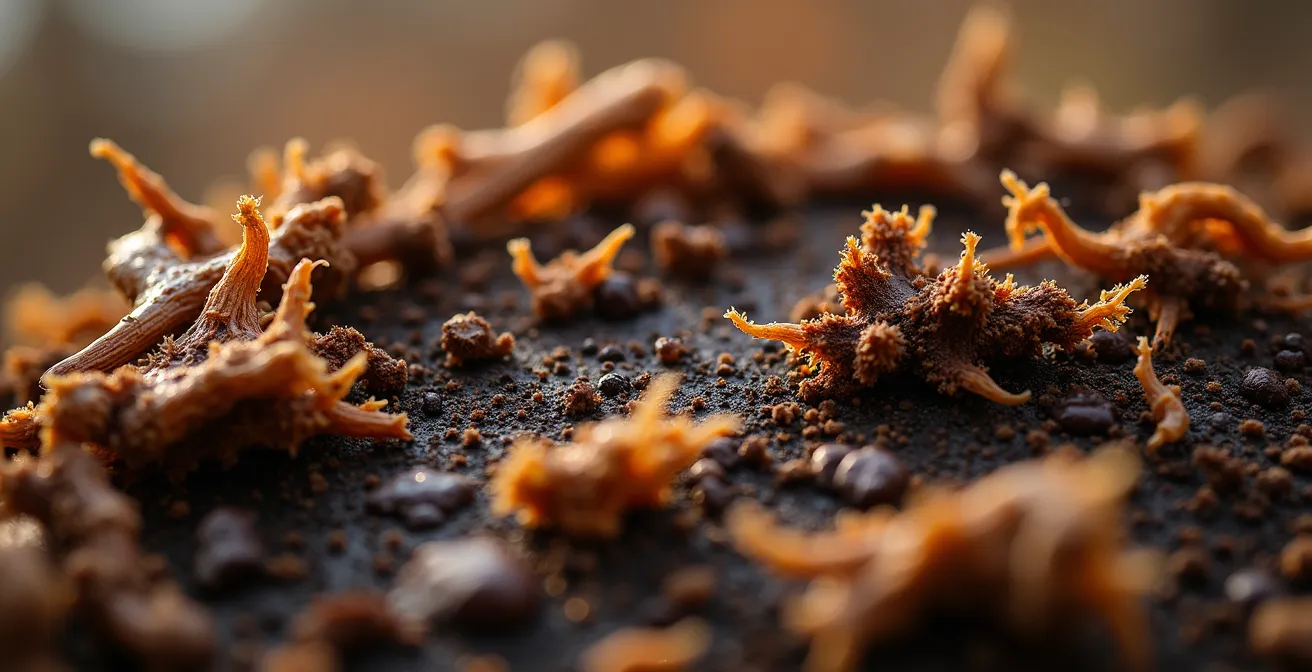
As the microscopic view shows, the decomposition of these fibres is a biologically active process that directly competes with your plants for resources. Your role is to provide enough nutrients for both the compost’s microbes and the plant’s roots. The timing and type of feed depend on the specific compost blend, as different materials have different properties.
This comparative table offers a general guideline for popular UK compost types, but always read the manufacturer’s instructions, as formulations vary widely.
| Compost Type | Start Feeding | Initial Feed Type | Mature Plant Feed |
|---|---|---|---|
| Standard peat-free | After 4 weeks | High nitrogen (seaweed extract) | Balanced NPK |
| Premium wool-based | After 6-8 weeks | Light liquid feed | Standard tomato feed |
| Coir-based | After 2-3 weeks | Complete fertilizer | Regular liquid feed |
| Wood fibre heavy | After 3 weeks | Extra nitrogen boost | Weekly feeding |
Therefore, begin a weak liquid feeding routine with a balanced fertiliser (or one high in nitrogen) as soon as seedlings have their first true leaves, typically 2-3 weeks after germination for most mixes. This proactive approach is the cornerstone of the hydroponic mindset.
Coir vs Green Waste: Which Peat Alternative Is Best for Seeds?
Choosing the right medium for seed sowing is critical, and in the peat-free world, the choice often comes down to coir-based versus green-waste-based composts. The best option depends on your approach to managing biostability. Coir, derived from coconut husks, is a largely inert, sterile, and structurally consistent material. Its fine texture and excellent drainage make it fantastic for germination, as it reduces the risk of ‘damping off’ disease, a common fungal issue that kills seedlings in overly wet and rich conditions.
However, ‘inert’ is the key word. Coir contains almost no nutrients. When using coir, you are fully embracing the hydroponic mindset: you must provide 100% of the plant’s nutritional needs from the moment of germination. Green waste compost, on the other hand, is microbially active and nutrient-rich. It’s a living material, which can be beneficial for mature plants but poses a risk to delicate seeds. Its variable consistency and potential for pathogens or weed seeds make it a less predictable choice for germination.
This fundamental difference is articulated perfectly by the experts. As the horticulture charity Garden Organic states in its peat-free growing guide:
Coir’s sterility and fine texture make it ideal for preventing ‘damping off’ disease but it’s inert. Green Waste is microbially active and richer, but this can be a risk for delicate seeds.
– Garden Organic, Peat-free growing guide
Many successful growers, including professional organisations, use a blended approach to get the best of both worlds.
Case Study: The National Trust’s Blended Approach
The gardening teams at the National Trust have become experts in peat-free cultivation. Originally, they mixed their own potting composts using a carefully balanced blend of coir for structure, loam for water retention, leaf mould for nutrients, and potting grit for drainage. Now, while also using some excellent pre-made mixes, the principle remains the same: they create a balanced medium that combines the sterile structure of materials like coir with the gentle fertility of well-rotted organic matter, proving that even sensitive, acid-loving plants can thrive without peat.
For beginners or for valuable seeds, a coir-based seed compost offers a more controlled, predictable environment. For those willing to manage the risks, a high-quality, finely sieved green waste compost can provide a nutritional head start, but vigilance is key.
The Fungus Gnat Plague: Why Are They Worse in Peat-Free Mixes?
If you’ve switched to peat-free, you’ve likely met their unwelcome residents: fungus gnats (Sciarid flies). These tiny black flies are more than an annoyance; their larvae, which live in the compost, feed on fungi and decaying organic matter, but will also chew on the delicate roots of seedlings and cuttings, causing them to wilt and die. Peat-free composts create a perfect storm for fungus gnat infestations. The combination of high moisture retention in the lower layers and the presence of slowly decomposing organic matter like wood fibre provides the ideal food source and habitat for the larvae.
The problem is exacerbated indoors or in greenhouses, where warmer temperatures accelerate their breeding cycle. The difference is stark; research from Which? Gardening shows that temperature dramatically affects fungus gnat reproduction, with their life cycle speeds up from 34 days at 15°C to just 14 days at 25°C. This rapid turnover means a small issue can become an infestation in a matter of weeks. The constantly damp conditions many peat-free mixes encourage are precisely what these pests need to thrive.

Controlling fungus gnats requires breaking their life cycle. This involves making the compost surface less hospitable for egg-laying adults while targeting the larvae living below. An Integrated Pest Management (IPM) approach, combining cultural, biological, and physical controls, is the most effective long-term strategy.
Your Action Plan: A UK-Specific IPM Strategy for Fungus Gnats
- Allow the top 2-3cm of compost to dry out completely between waterings, but use the ‘chopstick test’ to ensure the root zone remains moist.
- Apply beneficial nematodes (Steinernema feltiae) to the compost. Water them in when the compost temperature is consistently above 12°C for effective control.
- Place yellow sticky traps horizontally on the compost surface to catch egg-laying adults and monitor the population size.
- Apply a 1-2cm top-dressing of horticultural grit or coarse sand to the compost surface. This creates a dry barrier that physically deters adults from laying eggs.
- For severely infested plants, repot into fresh compost, carefully removing as much of the old, infested material from the roots as possible.
By disrupting their environment, you shift the balance back in your favour, protecting your vulnerable young plants from this pervasive pest.
How to Make Perfect Leaf Mould to Replace Peat in Your Potting Mix?
One of the best long-term solutions to the inconsistencies of commercial peat-free compost is to make your own key ingredient: leaf mould. Revered by gardeners for centuries, well-rotted leaf mould is the closest you can get to the holy grail of a peat substitute. It has a superb fine, crumbly texture that improves soil structure, and an excellent capacity to retain water without becoming waterlogged. While not rich in nutrients itself, it is teeming with beneficial microbial life that helps release nutrients in the wider compost mix, acting as a perfect ‘conditioner’.
As the National Trust gardeners know, “Collect fallen leaves and let them rot down into leaf-mould, which makes a great base for your own homemade potting compost.” The process is simple and requires patience more than effort. It relies on a slow, cool fungal decay, as opposed to the fast, hot bacterial decay of a traditional compost heap. Even gardeners in urban areas with limited space can produce this ‘black gold’ using a simple bin bag method.
Here is a step-by-step guide to making your own high-quality leaf mould:
- Collect the right leaves: Gather fallen leaves after the first frosts in late October or November. Oak, beech, and hornbeam are excellent as they break down easily. Avoid tough, waxy, or evergreen leaves like holly, laurel, or pine needles, as they take too long.
- Fill and dampen: Pack the leaves into black bin bags. If the leaves are dry, sprinkle them with a little water as you go; they should be damp, not sodden.
- Aerate and store: Pierce several holes in the sides of the filled bags with a garden fork to allow air to circulate. Tie the tops loosely and store them in a shady, out-of-the-way corner of the garden.
- Wait and check: Leave the bags for at least 12 months. Check them periodically; if they seem very dry, open them and add a little more water.
- Harvest your product: After one year, you will have a coarse, flaky leaf mould perfect for use as a soil improver or mulch. After two years, the leaves will have broken down into a fine, dark, crumbly material. Sieve this through a 10mm mesh to get a superb-quality ingredient for seed and potting mixes.
By investing time in making leaf mould, you create a sustainable, free, and superior alternative to both peat and many inconsistent commercial composts.
Why You Need to Add Cardboard to Your Kitchen Scraps to Stop the Rot?
A well-managed home compost bin is a cornerstone of sustainable gardening, turning waste into a valuable resource. However, a common failure is the slimy, smelly, rotten mess that results from adding only kitchen scraps. The reason for this failure is a simple imbalance in the carbon-to-nitrogen ratio (C:N). Kitchen scraps like vegetable peelings and fruit waste, along with grass clippings, are considered ‘greens’. They are rich in nitrogen and moisture, and they break down very quickly.
When you have an excess of greens, the compost heap becomes saturated with water and nitrogen. This creates anaerobic conditions (a lack of oxygen), where putrefying bacteria take over from the beneficial aerobic organisms. The result is a foul, ammonia-like smell and a slimy texture, instead of the sweet, earthy scent of good compost. To counteract this, you must balance the ‘greens’ with an equal volume of ‘browns’. ‘Browns’ are materials rich in carbon, which provide structure, absorb excess moisture, and are the energy source for the microbes.
The most accessible ‘brown’ material for most households is plain cardboard and paper. Torn-up egg boxes, toilet roll tubes, and non-glossy cardboard packaging are perfect. They create air pockets, balance the high nitrogen of the kitchen waste, and prevent the heap from compacting and turning anaerobic. Achieving this balance is the single most important rule of successful composting, a principle that turns potential failure into success. Many UK households have mastered this by layering materials to ensure a good mix.
Remember the key rule: for every bucket of kitchen scraps you add, add a roughly equal-sized bucket of torn cardboard or other ‘browns’ like autumn leaves or woodchip. This simple habit will stop the rot and transform your compost bin into a productive engine for your garden.
How to Strip Soil Nutrients Before Sowing Wildflowers?
While most of our gardening efforts are focused on adding fertility, there is one significant exception: creating a wildflower meadow. Native UK wildflowers have evolved to thrive in low-nutrient conditions. In rich, fertile soil, they are quickly outcompeted by vigorous grasses and weeds like docks and nettles. To give wildflowers a fighting chance, you must first actively strip the soil of excess nutrients, particularly nitrogen and phosphorus. This is a deliberate act of impoverishment that seems counterintuitive but is essential for success.
This process is the mirror image of building a compost heap; instead of adding nutrients, you are systematically removing them to recreate the poor soil conditions where these beautiful, delicate plants flourish. The goal is to reduce competition and allow the slower-growing wildflowers to establish. As The Wildlife Trusts point out, restoring these habitats is crucial, given that “More than 94% of the UK’s lowland peat bogs have been destroyed or damaged, and a wealth of wildlife has disappeared along with it.” Creating low-nutrient areas for wildflowers is a small but powerful way to support biodiversity.
There are several effective methods for reducing soil fertility, which can be used alone or in combination:
- Topsoil Removal: The most immediate and effective method, especially for small areas. Manually remove the top 5-6 inches of nutrient-rich topsoil to expose the poorer-quality subsoil beneath.
- Carbon Loading: Add a high-carbon material like untreated sawdust or chopped straw to the soil and dig it in. The microorganisms that break down this material will draw nitrogen from the soil to do so, locking it up and making it unavailable to plants.
- Hungry Cropping: Grow a nutrient-hungry crop like mustard or even a vigorous grass. Allow it to grow, then cut it down and—crucially—remove all the cuttings from the site before they can rot down. Repeating this process several times will gradually export nutrients from the soil.
- Fallowing: Simply leave the area to lie fallow for a full season, but diligently remove any and all weed growth before it can set seed and die back, which would return nutrients to the soil.
Once you have successfully lowered the nutrient levels (a soil test can confirm low phosphorus), you can sow your UK-native wildflower mix directly into the impoverished soil in autumn or spring, confident that you have given them the best possible start.
Key takeaways
- Peat-free composts are physically and biologically unstable, requiring proactive management of water, air, and nutrients.
- The “Chopstick Test” is a more reliable method than the finger test for assessing moisture throughout the pot profile to avoid root rot or desiccation.
- Early and consistent liquid feeding is mandatory to combat “nitrogen drawdown” from decomposing wood fibre, a primary cause of yellowing seedlings.
Why Does Your Compost Bin Smell Like Ammonia and Slime?
That sharp, unpleasant smell of ammonia emanating from your compost bin, accompanied by a slimy, wet texture, is a clear distress signal. It’s the sign of an anaerobic environment, where your compost heap is suffocating and putrefying rather than decomposing. This happens when there is a severe imbalance in the carbon-to-nitrogen ratio, specifically, a massive excess of high-nitrogen ‘green’ materials like grass clippings and kitchen waste, coupled with a lack of ‘brown’ carbon materials and poor aeration. The result is a compacted, waterlogged mass where oxygen cannot penetrate.
The ammonia smell is nitrogen escaping as a gas because there isn’t enough carbon for the microbes to use it to build their bodies. The slime is the result of anaerobic bacteria taking over. This process is not only unpleasant but also environmentally damaging. The same principles that lead to smelly compost on a small scale contribute to greenhouse gas emissions on a larger one; the Committee on Climate Change estimates that drained peatland releases around 39 tonnes of CO2 per hectare annually because of similar aerobic decomposition processes.
Thankfully, a slimy, smelly compost bin is not a lost cause. It can be rescued with an emergency triage that focuses on re-establishing the correct C:N balance and reintroducing oxygen.
Here is a quick-fix plan for a typical UK “Dalek” compost bin:
- Stop feeding it greens: Immediately cease adding any nitrogen-rich materials. No grass clippings or kitchen scraps for at least four weeks.
- Add browns NOW: The most important step. Add a large volume of carbon-rich ‘brown’ materials. This includes torn-up cardboard, scrunched-up newspaper, or, ideally, a bag of dry autumn leaves you’ve saved.
- Absorb moisture: Mix in dry materials like wood chips, sawdust, or even bedding from a pet rabbit or guinea pig to soak up the excess liquid.
- Aerate vigorously: Use a garden fork or a compost aerator to turn the contents as much as possible. Your goal is to break up the compacted clumps and create air channels.
- Let it breathe: During a spell of dry weather, leave the lid off the bin for a day or two to help some of the excess moisture evaporate.
By taking these immediate actions, you can rescue your compost heap from the brink, stop the smell, and get it back on the path to producing valuable, sweet-smelling compost for your garden.