In summary:
- Focus on the ‘Fabric First’ principle: prioritise insulation and draught-proofing before upgrading your heating system.
- Start with high-ROI, low-cost fixes like draught-proofing your front door for under £50, which can pay for itself in one year.
- Follow a specific upgrade sequence: tackle the loft first, then walls, windows, and finally the boiler or heat pump.
- View energy efficiency as a long-term property investment that increases value, not just a cost-cutting measure.
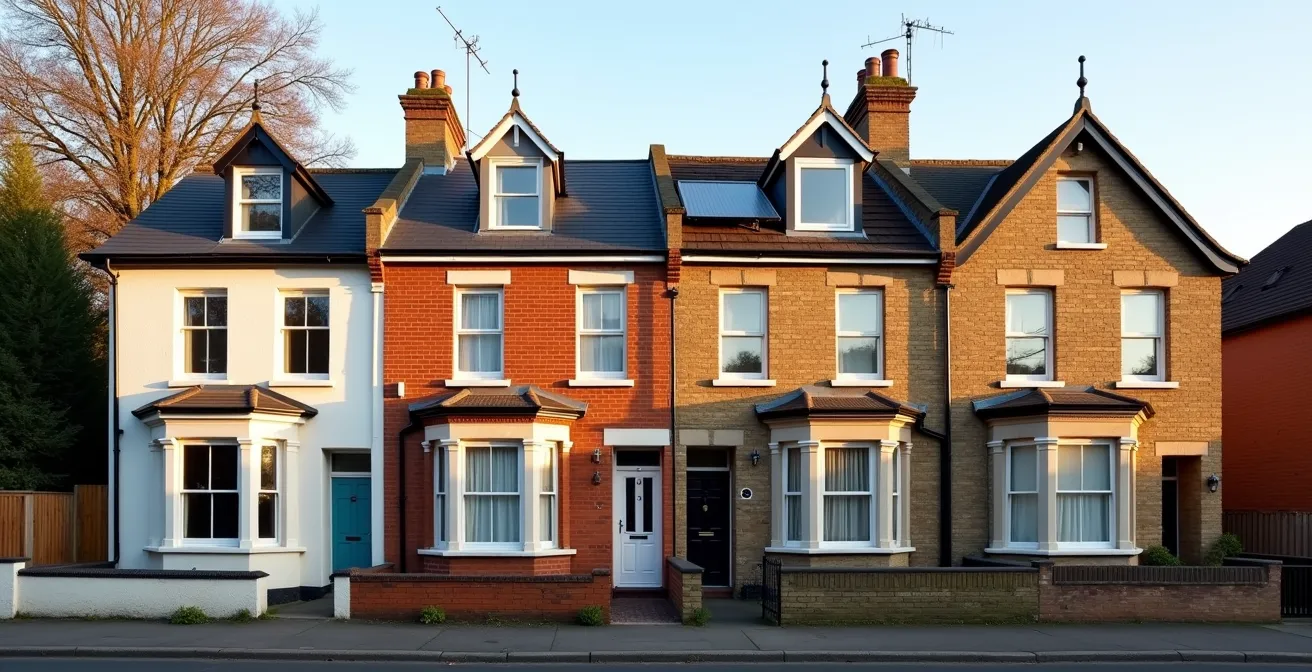
For many families in 1970s semi-detached houses across England, the constant dread of the next energy bill has become a harsh reality of the cost-of-living crisis. You’ve likely heard the standard advice: turn down the thermostat, wear a jumper, switch to LED bulbs. While not incorrect, these tips often feel like small plasters on a gaping wound, failing to address the fundamental inefficiencies of an ageing housing stock. They offer temporary relief but no long-term strategy, leaving you feeling like you’re constantly fighting a losing battle against heat loss.
But what if the path to genuinely lower bills wasn’t about a random checklist of small sacrifices? What if, instead, it was a structured financial plan? The secret lies not in doing everything at once, but in doing the right things in the right order. This guide moves beyond generic advice to provide a prioritized, budget-first roadmap based on the ‘Fabric First’ principle. We will treat your home like a business asset, focusing on a clear sequence of upgrades—from highest to lowest Return on Investment (ROI)—to systematically cut waste, lock in savings, and permanently increase your home’s value and comfort.
This article provides a clear, step-by-step financial plan to guide your home energy efficiency journey. Below, the summary outlines the key stages of this roadmap, from identifying the biggest sources of heat loss to financing larger projects, ensuring every pound you invest works as hard as possible to reduce your bills.
Summary: A Financial Roadmap to an Energy-Efficient Home
- Why Does Your Semi-Detached House Lose 30% of Its Heat Through the Roof?
- How to Draught-Proof Your Front Door for Under £50 Before Winter Arrives?
- New Kitchen or Insulation: Which Adds More Value to a UK Property in the Long Run?
- The Thermostat Mistake That Costs British Families £150 Every Winter
- In Which Order Should You Upgrade Your Home to Avoid Wasting Money?
- How to Calculate Your Real Monthly Payments to Avoid Building Credit?
- Why Did Your Neighbour Get a C Rating While You Got a D?
- How to Project Manage a Whole-House Retrofit to PAS 2035 Standards?
Why Does Your Semi-Detached House Lose 30% of Its Heat Through the Roof?
It’s a startling figure, but an uninsulated home loses heat through a predictable set of pathways, and the roof is the single biggest culprit. Because warm air rises, a poorly insulated loft acts like an open chimney for your heating budget. For a typical 1970s semi-detached house, this is the first and most critical battleground in reducing energy consumption. In fact, around 26% of a home’s heat is lost through an uninsulated roof, according to recent UK home insulation research. This isn’t just a minor leak; it’s a torrent of wasted energy and money flowing directly out of your home.
Before considering any other upgrade, you must address the thermal envelope of your loft. The current UK Building Regulations (Part L) recommend a mineral wool insulation depth of at least 270mm. Many homes built before the 1980s have as little as 25mm, or none at all. Topping this up is not just a ‘nice to have’; it’s the most cost-effective major energy-saving measure you can undertake. The investment is relatively low, especially as a DIY project, and the payback period is often just a few years, after which the savings are pure profit for the lifetime of the home.
Action Plan: Insulating Your Loft to Modern Standards
- Measure your loft space and calculate the required insulation depth; the UK minimum for mineral wool is 270mm.
- Lay the first layer of insulation (typically 100mm) between the joists, ensuring there are no gaps.
- Install the second layer (170mm) at right angles to the first, creating a ‘cross-hatch’ pattern to cover the joists and prevent thermal bridging.
- Ensure a 25mm air gap is left at the eaves to allow for crucial ventilation and prevent condensation build-up.
- Insulate the loft hatch itself with a piece of rigid insulation board and fit draught-proofing strips around its frame to complete the seal.
Addressing the roof first is the cornerstone of the ‘Fabric First’ approach. It ensures that any future investments in heating systems aren’t wasted by trying to heat a home that can’t retain warmth.
How to Draught-Proof Your Front Door for Under £50 Before Winter Arrives?
While loft insulation tackles the biggest source of heat loss, draught-proofing offers the highest and fastest return on investment. It’s the definition of a quick win. Cold draughts can cause you to turn up the thermostat, but they also make a room feel colder than it is, ruining comfort. Your front door, with its letterbox, keyhole, and frame, is a primary source of these intrusive draughts. The good news is that you can comprehensively seal it for under £50 using materials from any major UK DIY retailer, and the payback period is often less than a single winter.
A case study of a typical UK semi-detached home confirms the financial logic. A DIY investment of just £30-£40 on materials like EPDM self-adhesive strips for the frame, a brush excluder for the bottom, and a keyhole cover can generate annual savings of £40-£50. This simple project effectively pays for itself within the first year. By eliminating these cold spots, you not only save money but also dramatically improve the feeling of comfort in your hallway, preventing cold air from permeating the rest of the ground floor.
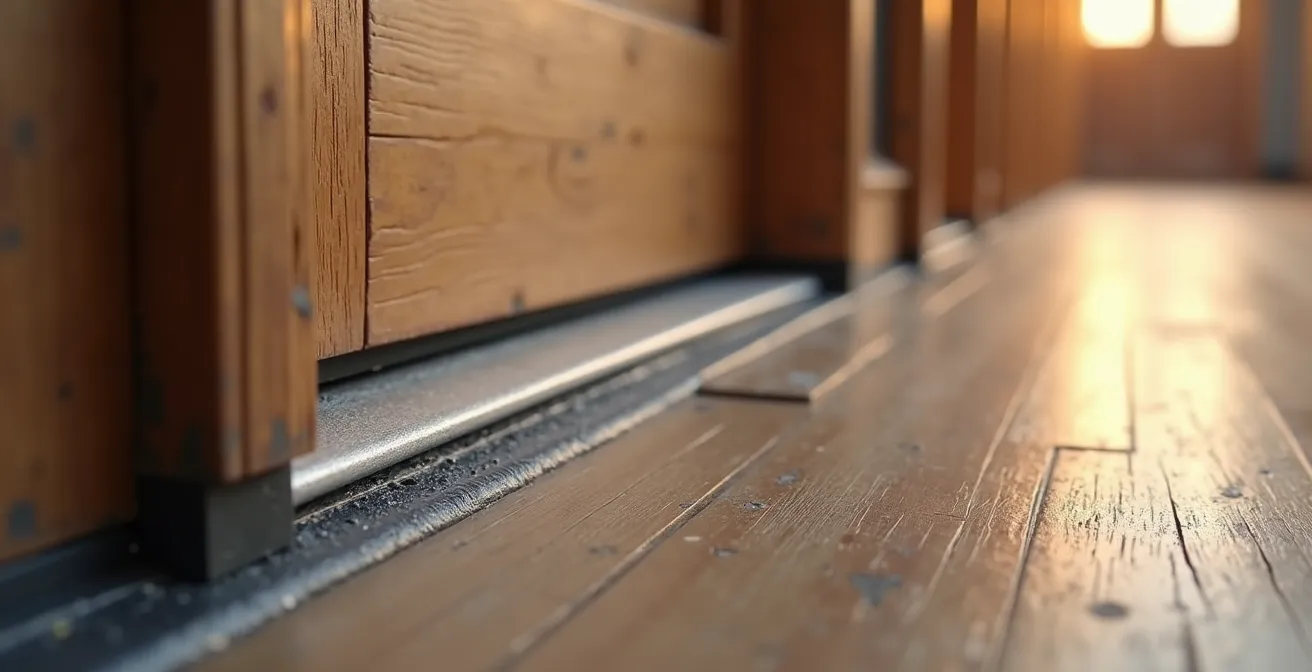
As the image demonstrates, the goal is to create a continuous, airtight seal around the entire door. EPDM strips compress when the door is closed, blocking gaps, while a brush seal at the bottom stops air movement underneath. Don’t forget smaller openings like the letterbox, which should have its own brush-lined cover. When combined, these small fixes add up to a significant barrier against heat loss. In fact, the Energy Saving Trust confirms you can save as much as £85 per year by comprehensively draught-proofing your entire home.
This is the essence of a budget-first approach: start with the low-hanging fruit that provides immediate financial relief and builds momentum for larger projects.
New Kitchen or Insulation: Which Adds More Value to a UK Property in the Long Run?
When faced with a limited budget for home improvements, homeowners often gravitate towards cosmetic upgrades like a new kitchen or bathroom. They offer immediate visual appeal and are widely perceived as adding value. However, from a purely financial and long-term perspective, investing in the thermal efficiency of your home’s fabric is almost always the superior choice. A new kitchen begins to depreciate the moment it’s installed, but a well-insulated home provides permanent energy savings and a lasting uplift in property value.
The property market is increasingly savvy to energy efficiency. An improved Energy Performance Certificate (EPC) rating is no longer just a piece of paper; it’s a tangible financial asset. Indeed, recent UK property market studies show homes sell for between 5% and 14% more if they have a better EPC rating. While a new kitchen might add 5-10% to the value initially, this perceived value fades with changing trends. The value added by a high EPC rating, however, is directly tied to lower running costs—a benefit that only becomes more valuable as energy prices rise.
This table from the Energy Saving Trust puts the investment into sharp focus, comparing a lifestyle upgrade with a fabric-first one. The numbers clearly show that while insulation has a payback period, it delivers ongoing financial returns and a permanent improvement to the asset value of your home.
| Investment Type | Average Cost | Annual Savings | Payback Period | Property Value Impact |
|---|---|---|---|---|
| New Kitchen | £10,000-15,000 | £0 | N/A | 5-10% immediate, depreciates |
| Full Home Insulation | £4,000-8,000 | £400-600 | 8-15 years | 3-5% permanent, improves EPC |
Choosing insulation over a new kitchen is a strategic financial decision. It shifts your mindset from short-term spending to long-term investment, securing lower bills and a more valuable, future-proofed property.
The Thermostat Mistake That Costs British Families £150 Every Winter
One of the most common and costly mistakes in UK homes is the “set it and forget it” approach to the thermostat, often coupled with cranking it up high to “heat the house quickly.” This fundamentally misunderstands how central heating works and leads to massive energy waste. Your boiler works at a constant rate regardless of the thermostat setting; setting it to 25°C won’t heat the room any faster than setting it to 20°C, it will just keep burning gas until it reaches that expensive, and likely uncomfortable, higher temperature.
The financial impact of this simple error is significant. As the Energy Saving Trust, a leading authority on UK home energy, points out, a small adjustment can lead to substantial savings. Their guidance is clear and based on extensive data, as highlighted in their official advice:
Turning your thermostat down by just a single degree can save you as much as £90 per year
– Energy Saving Trust, Official energy saving guidance 2024
Setting the thermostat just two degrees higher than necessary could therefore be costing you over £150 every single winter. The key is not just a lower temperature, but an appropriate one. For most, a comfortable living temperature is between 18°C and 21°C. Anything above this is often unnecessary and expensive. Using programmable controls to set a ‘setback’ temperature (around 16°C) for overnight or when the house is empty is also critical for avoiding wasted heating.
Mastering your thermostat isn’t about being cold; it’s about being in control. It’s a behavioural change that costs nothing but delivers a significant return, making it an essential part of any home energy reduction strategy.
In Which Order Should You Upgrade Your Home to Avoid Wasting Money?
This is the most critical question for any homeowner on a budget. Investing in the wrong order—for example, installing an expensive new heat pump in a poorly insulated house—is like pouring water into a leaky bucket. You will waste thousands on a system that is forced to work too hard, negating any potential savings. The solution is a disciplined, professional methodology known as the ‘Fabric First’ approach. This principle dictates a clear and logical sequence of upgrades to maximise ROI and ensure each investment builds on the last.
The roadmap is simple and prioritises tackling the building’s thermal envelope before touching the heating systems. A full retrofit to net-zero standards can be expensive, estimated at around £26,000 for a typical home, but the journey can be broken down into manageable, financially logical stages:
- Stage 1: Quick Wins (Payback: ~1 year). Start with comprehensive draught-proofing of doors, windows, loft hatches, and floorboards. This is the lowest cost (£100-£250) and highest ROI activity.
- Stage 2: The Big Insulators (Payback: 3-5 years). This is where you tackle the main fabric. Insulate the loft to 270mm and, if your home has them, get cavity walls filled. These are medium-cost (£1,500-£2,000) measures with excellent returns.
- Stage 3: The Major Fabric (Payback: 15+ years). Now, consider more expensive upgrades like high-performance double or triple glazing and, if you have solid walls, external or internal wall insulation. These are bigger investments (£5,000-£15,000).
- Stage 4: The Heating System (After all of the above). Only once you have reduced your home’s heat demand as much as possible should you consider upgrading your boiler or investing in a heat pump. The system you need will now be smaller, cheaper, and more efficient.
By following this ‘Fabric First’ sequence, you are not just spending money; you are making a series of calculated investments. Each step reduces the energy demand of your home, making the next step more effective and affordable, paving a clear path to that £600 annual saving.
How to Calculate Your Real Monthly Payments to Avoid Building Credit?
While the initial stages of the ‘Fabric First’ approach are low-cost, major upgrades like insulation or a new heating system require significant capital. The key to financing these improvements without falling into high-interest debt is to understand the available green finance options and government incentives. Simply putting a £5,000 insulation job on a credit card is a financial trap. Instead, homeowners should explore structured loans with favourable rates, many of which are specifically designed for energy-efficient upgrades.
The UK government also provides direct financial support to incentivise the switch to low-carbon heating. For example, the UK government offers up to £7,500 through the Boiler Upgrade Scheme (BUS) towards the cost of an air source or ground source heat pump. This grant can drastically reduce the upfront cost, making the investment far more manageable. When calculating the total cost, this grant should be subtracted from the quote before you even begin to consider finance options. This brings the real capital required down significantly.
For the remaining amount, a range of finance options exist, each with different implications for your monthly budget. It is vital to compare them based on the Annual Percentage Rate (APR) and the term of the loan to understand the true cost of borrowing.
| Finance Type | Typical APR | Max Amount | Term | Best For |
|---|---|---|---|---|
| Personal Loan | 6-12% | £25,000 | 5 years | Quick access, no security |
| Remortgage | 3-5% | Varies | 25+ years | Large projects, lower rate |
| Green Loan | 4-8% | £15,000 | 7 years | Eco improvements only |
Smart financing is the final piece of the puzzle. By leveraging grants and low-interest green loans, you can undertake major retrofitting projects in a way that is financially sustainable, ensuring your path to energy efficiency doesn’t create a new financial burden.
Why Did Your Neighbour Get a C Rating While You Got a D?
The Energy Performance Certificate (EPC) has become the definitive scorecard for a home’s efficiency, and the difference between a ‘D’ and a ‘C’ rating is more than just a letter. It represents a tangible difference in running costs and property value. Seeing a similar house next door achieve a higher rating can be frustrating, but it’s almost always down to specific, documented upgrades that you may not have, or that the EPC assessor was not made aware of. The government’s goal is to get as many homes as possible to a C rating or above, and progress is being made. In England the share at this level increased from 12% in 2010 to 52% in 2022.
An EPC assessment is a non-invasive survey. The assessor can only include features they can see or for which they are provided with documentary evidence. If you’ve had cavity wall insulation installed but have no certificate, or replaced old windows with FENSA-certified double glazing but don’t have the paperwork, the assessor must assume the worst-case scenario for the age of the property. This is often the key reason for a disappointing rating. The neighbour with the ‘C’ rating likely had a folder of evidence ready: insulation guarantees, window certificates, and boiler service records.
Furthermore, small details that are easily overlooked can have a cumulative effect. The EPC software awards points for low-energy lighting. If your neighbour has LED bulbs in more than 80% of their fittings and you don’t, that alone can impact the final score. The age and efficiency of your boiler, the presence of thermostatic radiator valves (TRVs), and the insulation on your hot water cylinder all contribute to the final calculation. A ‘D’ rating isn’t a judgement; it’s a diagnostic tool showing you exactly where the opportunities for improvement lie.
Your EPC is your personal roadmap. Use it to identify the most impactful upgrades recommended for your specific property, gather the necessary evidence for your next assessment, and systematically climb the ladder from ‘D’ to ‘C’ and beyond.
Key takeaways
- The ‘Fabric First’ principle is non-negotiable: insulate and draught-proof before upgrading heating systems to maximise ROI.
- Start with quick, cheap wins like draught-proofing, which can pay for itself in under a year and build momentum.
- View efficiency upgrades as a long-term investment in property value, not just an expense, as a higher EPC rating directly translates to a higher sale price.
How to Project Manage a Whole-House Retrofit to PAS 2035 Standards?
When you move beyond single measures and consider a whole-house retrofit, the project becomes more complex. To ensure work is done to a high standard and delivers the expected energy savings without causing unintended consequences (like damp or poor air quality), the UK industry has developed a robust framework: PAS 2035. While you as a homeowner don’t need to be an expert in the standard, understanding its principles is key to project managing the process and hiring the right, TrustMark-registered professionals.
At its core, PAS 2035 is about treating your house as a system. It’s a process, not a product. It mandates a ‘whole-dwelling assessment’ that considers the home’s age, construction, and your family’s needs. This avoids the piecemeal approach that can lead to problems. The process introduces key professional roles to protect you:
- Retrofit Assessor: Conducts the initial in-depth assessment of your property.
- Retrofit Coordinator: The most important role for you. This individual is your project manager, overseeing the entire process from assessment to completion, ensuring all work complies with the standard and that different trades (e.g., insulators and window fitters) work together correctly.
- Retrofit Designer: Creates the detailed plan for the upgrades based on the assessment, ensuring the right solutions are specified for your particular home.
Engaging a Retrofit Coordinator is the single best way to manage a large project. They will help you navigate the complexities, find qualified installers, and ensure the final result is a warmer, healthier, and cheaper-to-run home. Insisting on a PAS 2035-compliant process is your quality guarantee, ensuring your significant investment is protected and effective.
By adopting this professional framework, you shift from being a simple consumer of services to an informed project manager of your own home’s future, ensuring every pound spent on your retrofit is an investment in quality and long-term performance.
Frequently Asked Questions about Home Energy Efficiency & EPCs
What evidence should I show the EPC assessor?
To ensure you get the best possible rating, you should provide all relevant documentation. This includes certificates for double glazing (such as a FENSA certificate), boiler service records, receipts or guarantees for loft or wall insulation, and proof of installing LED lighting in 80% or more of your home’s light fittings.
Can I check my neighbour’s EPC rating?
Yes, you can. In the interest of transparency, all Energy Performance Certificates are public records. You can view the EPC for any property in England, Wales, or Northern Ireland on the official gov.uk EPC Register simply by entering its postcode.
How much difference does one EPC band make to property value?
The impact is significant and growing as more buyers prioritise running costs. In the current UK property market, improving your home’s rating from a ‘D’ to a ‘C’ can add approximately 3-5% to its overall value, making it a powerful financial investment.