The persistent damp in your old home isn’t a problem to be sealed; it’s a symptom of a breathable structure being suffocated by modern materials.
- Modern cements and gypsum plasters trap moisture, causing brick decay and structural damage within years.
- Lime plaster works as a dynamic “moisture management system,” absorbing and releasing water vapour to keep walls dry and healthy.
Recommendation: Ditch the quick fixes. Embrace a ‘fabric first’ approach using lime-based systems to work with your home’s original design, not against it.
You see the familiar, frustrating bloom of damp on the wall of your beloved stone cottage. Perhaps it’s a Victorian terrace you’ve poured your heart and soul into renovating. The typical response, encouraged by decades of modern building practice, is to seal it. Hack off the old plaster, apply a dense cement render, maybe some waterproof tanking slurry, and finish with a smooth gypsum skim. The problem vanishes, for a while. But this approach is a fundamental misunderstanding of how pre-1919 buildings were designed to live and breathe. It is not a cure; it is merely masking a symptom while actively harming the building’s very soul.
The belief that a building must be an impermeable box is a modern fallacy. Older homes were constructed as open, vapour-permeable systems. They were designed to manage moisture, not to block it. When we introduce impervious materials like cement and gypsum, we disrupt this delicate balance. We trap the moisture that is naturally present, forcing it to concentrate and cause the very decay we sought to prevent. This article will dismantle the myths surrounding modern repairs and reveal the science behind why lime plaster isn’t just a “nice-to-have” heritage material, but an essential component for the health and longevity of your period property. We will explore how it actively manages moisture, why modern alternatives are so destructive, and how to create a holistic, breathable system that will protect your investment for generations to come.
This guide will walk you through the core principles of breathable construction, providing the knowledge you need to make informed decisions for your renovation project. From understanding the materials to implementing the right techniques, you’ll see why embracing tradition is the most forward-thinking choice you can make.
Summary: The Essential Guide to Lime Plaster in Heritage Homes
- Why Do Modern Cements Damage Victorian Bricks Within 5 Years?
- How Does Lime “Manage” Moisture Instead of Blocking It?
- Polystyrene vs Wood Fibre: Which Insulation Lets Your Walls Breathe?
- How to Insulate a Victorian Terrace Without Causing Damp Problems?
- NHL 3.5 or Lime Putty: Which Mix Is Right for Internal Insulation?
- The Drying Mistake That Causes Lime Plaster to Crack and Fail
- How to Apply Hemp-Lime Plaster to Improve U-Values Without Losing Space?
- Is the Premium Price of Lime Plaster Worth It for Dry Walls?
Why Do Modern Cements Damage Victorian Bricks Within 5 Years?
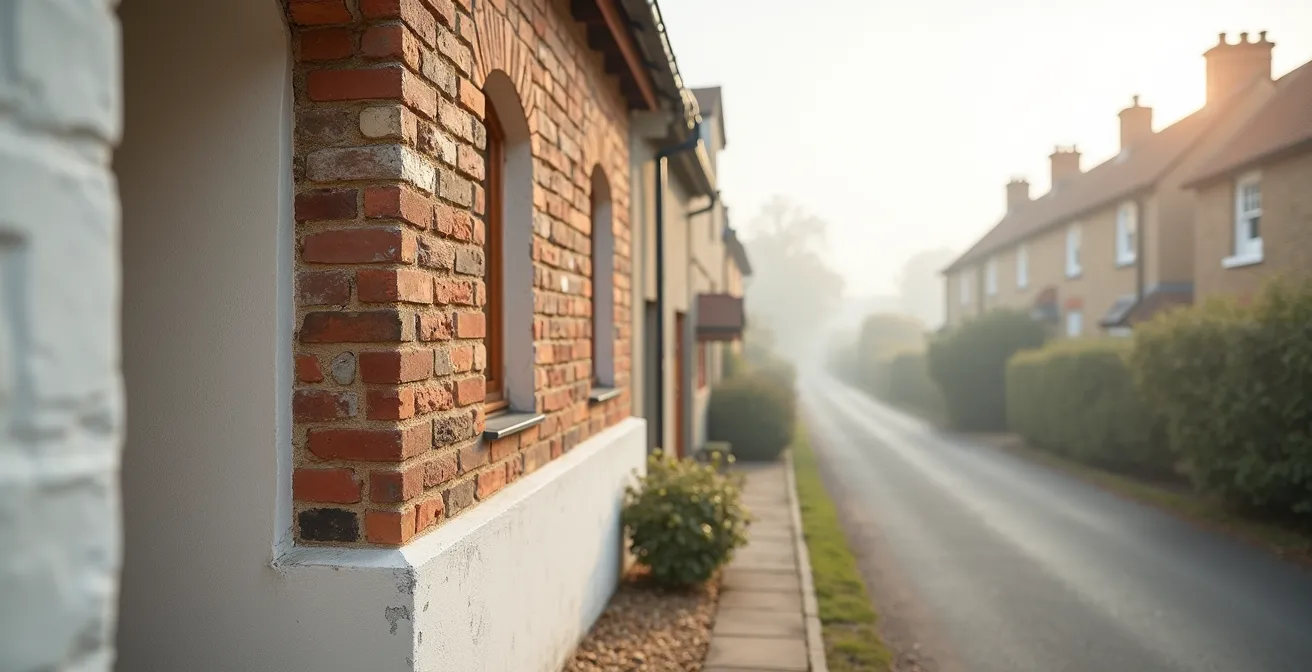
The cardinal sin committed against countless Victorian and older properties is the application of modern cement mortar or render. It’s often done with good intentions, seen as a stronger, faster, and more waterproof solution. However, this fundamentally misunderstands the materials. Victorian bricks are relatively soft and porous; they were designed to be laid with an even softer, porous lime mortar. The entire wall functions as a single, breathable system. Moisture entering the wall can easily escape through the lime mortar joints, which act as a release valve.
When you introduce hard, dense cement, you reverse this relationship. The cement is significantly harder and less vapour-permeable than the brick. Moisture can no longer escape through the pointing. Instead, it becomes trapped in the bricks themselves. As this trapped moisture freezes in winter, it expands, causing the face of the brick to delaminate and crumble—a process known as spalling. As one case study on Victorian walls handling moisture explains, salts contained in the moisture crystallise on the brick face as they evaporate, accelerating the decay. The wall, once a healthy, breathing entity, begins to suffocate and destroy itself from within.
Worryingly, this damaging practice is sometimes still recommended. You might hear advice, even from some in the trade, to use sand and cement with a waterproofer on an internal wall. This creates a completely sealed, non-breathable barrier, guaranteeing that any moisture from behind will be trapped. It’s the equivalent of putting a plastic bag over a living thing; condensation, mould, and decay are the inevitable results. A breathable structure requires a breathable finish, without exception.
How Does Lime “Manage” Moisture Instead of Blocking It?
Unlike cement, which forms a rigid, impermeable barrier, lime plaster works in harmony with a building’s natural moisture cycle. The key to its success lies in two properties: it is both hygroscopic and vapour-permeable. This means it can actively attract and absorb moisture from the air when humidity is high (like from cooking or showering), and then release it as vapour when conditions become drier. It doesn’t block water; it manages it. Think of it less as a raincoat and more as high-performance athletic wear that wicks sweat away from the skin to keep you dry and comfortable.
This active process prevents moisture from ever reaching saturation point within the wall fabric. Condensation doesn’t get a chance to form on the surface, which in turn inhibits mould growth. The continuous movement of moisture also prevents the build-up of damaging salts that are so destructive to old brick and stonework. Studies confirm the effectiveness of this system, suggesting that historic buildings renovated with lime can experience up to 70% less moisture build-up compared to those sealed with modern materials. This is not a marginal improvement; it’s a complete change in the physics of how the wall performs.
As Historic England advises, traditional construction is fundamentally designed to breathe. When a non-breathable layer is added, moisture becomes trapped, leading to a cascade of problems from mould to the decay of structural timbers. Lime plaster is the key that unlocks this intended function, allowing the entire structure to regulate its own humidity and remain healthy for the long term.
Polystyrene vs Wood Fibre: Which Insulation Lets Your Walls Breathe?
Once you’ve committed to a breathable plaster, the next logical step is insulation. Here again, the modern instinct to seal everything can be disastrous. Applying standard rigid foam insulation boards like Polystyrene (EPS) or Polyisocyanurate (PIR) directly to a solid stone or brick wall creates a cold, impermeable barrier on the inside. Any warm, moist air from the room that finds its way past the board will hit the now-colder wall surface, condense, and become trapped. You have just created a perfect, hidden environment for damp, mould, and rot.
The solution is to choose an insulation material that is also part of the breathable system. Materials like wood fibre, cork, and hemp work in perfect synergy with lime plaster. They are also hygroscopic and vapour-permeable, allowing them to buffer moisture and let it pass through to the lime, which then releases it. This creates a fully breathable wall assembly from inside to out. The Royal Institution of Chartered Surveyors (RICS) specifically warns against this trap, as noted by heritage experts Mitchell & Dickinson:
Rigid foams and plastic vapour barriers applied to solid masonry can trap moisture, increasing damp risks and driving salts to the surface especially harmful to historic stone and brick.
– Royal Institution of Chartered Surveyors (RICS), Breathable Insulation for Listed Buildings
The difference is stark when you compare the materials directly. Wood fibre actively participates in moisture management, while polystyrene forms a roadblock, creating a high-risk zone for interstitial condensation. This is why heritage bodies like Historic England consistently recommend breathable insulation systems.
This table, based on guidance from heritage building specialists, starkly contrasts the two approaches to insulating solid walls.
| Property | Wood Fibre | Polystyrene |
|---|---|---|
| Moisture management | Hygroscopic & vapour-permeable | Vapour barrier |
| Compatibility with lime | Perfect partner for breathable system | Creates moisture trap |
| Historic England guidance | Consistently recommended | Risk of condensation warned |
| Acoustic performance | Good | Poor |
| Environmental impact | Low embodied carbon | High carbon footprint |
How to Insulate a Victorian Terrace Without Causing Damp Problems?
Insulating an old home is not about simply adding the thickest material possible; it’s a strategic process that must respect the building’s construction. The most robust and responsible method is the ‘Fabric First’ approach, championed by Historic England and conservation experts. This philosophy prioritises improving the existing building fabric before adding new layers. It’s a holistic approach that ensures you’re not just trapping heat, but also managing moisture and preserving the structure.
The process is a sequential and logical one. You don’t jump straight to wall insulation. You start with the basics: repairing any defects in the roof, gutters, and walls that could be letting water in. Then, you tackle the most significant sources of heat loss with the least invasive measures, such as comprehensive draught-proofing of windows, doors, and floors, and insulating the loft with a breathable material like sheep’s wool. Only after these steps are completed should you consider internal wall insulation. This ensures the building is already performing as well as it can before you make more significant alterations.
When you do get to the walls, the choice of a breathable system is paramount. This typically involves using wood fibre boards fixed to the wall, which are then plastered directly with lime. This creates a warm, dry, and fully vapour-permeable assembly that enhances comfort without compromising the building’s health. This system also brings ancillary benefits, such as a significant improvement in acoustic performance compared to hard, reflective gypsum finishes. Furthermore, choosing natural materials aligns with a more sustainable building practice; for instance, the production of lime plaster generates up to 45% less carbon dioxide than its cement-based counterparts.
Your ‘Fabric First’ Renovation Checklist: A Heritage-Approved Approach
- Maintenance First: Conduct a thorough survey and repair all defects in the roof, walls, windows, and rainwater goods to stop water ingress at the source.
- Draught-Proofing: Meticulously draught-proof all gaps around doors, windows, suspended floors, and service penetrations. This is a highly effective, low-cost first step.
- Loft/Roof Insulation: Insulate the loft or roof space to the recommended depth using a breathable material like sheep wool or cellulose to allow moisture to escape.
- Windows: Prioritise repairing and overhauling original sash windows. Consider secondary glazing as a highly effective, reversible alternative to full replacement.
- Wall Insulation (Final Step): Only after all other steps are complete, consider breathable internal wall insulation using a system like wood fibre boards finished with lime plaster.
NHL 3.5 or Lime Putty: Which Mix Is Right for Internal Insulation?
Once you’ve decided on lime, you’ll discover it’s not a single product but a family of materials. The two most common types for internal plastering are Natural Hydraulic Lime (NHL) and non-hydraulic lime putty. The choice between them depends on the specific conditions of the wall and the desired properties of the plaster. Understanding the difference is key to a successful, long-lasting finish.
Lime Putty (also known as ‘fat lime’ or ‘air lime’) is the most traditional form. It’s made by slaking quicklime with an excess of water and letting it mature. It sets very slowly through a process called carbonation, by absorbing carbon dioxide from the air. This slow set makes it wonderfully flexible and exceptionally breathable—the ‘gold standard’ for vapour permeability. It is the ideal choice for most sheltered internal applications on dry, stable backgrounds. Its soft, forgiving nature makes it perfect for accommodating the minor movements inherent in old buildings.
Natural Hydraulic Lime (NHL), on the other hand, is derived from limestone containing natural clays. This gives it a ‘hydraulic set’—it starts to set with the addition of water, much like cement, before continuing to cure through carbonation. NHLs are categorised by their strength (NHL 2, 3.5, and 5). For internal plastering, NHL 3.5 is a common choice. It offers a faster, more robust set than lime putty, making it better suited for more demanding situations, such as damp or exposed walls where a degree of hardness and water resistance is beneficial. However, this strength comes at a small cost to flexibility and ultimate breathability compared to pure lime putty.
This comparative table clarifies the key differences, helping you select the right material for your specific project needs.
| Property | NHL 3.5 (Hydraulic) | Lime Putty (Non-Hydraulic) |
|---|---|---|
| Setting mechanism | Sets with water contact | Carbonation only |
| Flexibility | Moderate | Excellent |
| Breathability | Good | Brilliant |
| Best for | Exposed/damp walls | Sheltered interiors |
| Working time | Shorter | Longer |
| Form | Powder | Putty |
The Drying Mistake That Causes Lime Plaster to Crack and Fail
Working with lime is not like working with modern gypsum. Gypsum plaster sets quickly through a chemical reaction. Lime, especially lime putty, cures slowly through carbonation, a process that can take weeks or even months. The biggest mistake a renovator can make is trying to rush this process. Forcing lime to dry too quickly—by using dehumidifiers, turning up the heating, or having too much airflow—will cause it to shrink, crack, and fail. It needs to dry slowly and gently.
Proper curing is a process of management. The plaster needs to be protected from direct sun, wind, and frost. The goal is to keep the plaster ‘green’ (damp) for as long as possible to allow carbonation to penetrate deep into the material. This slow, patient process is what gives lime its remarkable flexibility and self-healing properties, allowing it to accommodate small movements in the building’s structure without cracking. As Historic England notes, the variable properties of lime, derived from its source rock, are what make it so eminently compatible with traditional materials, unlike rigid cement mortars.
The application itself is a multi-coat process that requires careful control of suction between layers. A base coat might be applied and left to cure for a month before the next coat is considered. Before applying a subsequent coat to a dry background, the surface must be dampened down to prevent it from sucking the moisture out of the new layer too quickly. Each stage—from the initial ‘scratch’ coat to the final, smooth finish—is a deliberate and unhurried craft. Rushing is the enemy of a good lime job.
How to Apply Hemp-Lime Plaster to Improve U-Values Without Losing Space?
For renovators looking to maximise thermal performance without sacrificing too much internal floor space, a hemp-lime plaster offers a compelling solution. This is not just a surface finish but a lightweight, insulating plaster. It’s created by mixing hemp shiv (the woody core of the hemp plant) with a lime binder, typically an NHL. The resulting material can be applied directly to masonry walls in thicker coats than standard plaster, creating a monolithic layer of breathable insulation.

The magic of hemp-lime lies in its structure. The hemp fibres create a matrix full of tiny air pockets, which provide the insulation, while the lime binder ensures the entire system remains fully vapour-permeable and hygroscopic. As heritage consultants Mitchell & Dickinson state, materials like hemp-lime are ideal because they “complement traditional construction, allowing moisture to move and buildings to dry safely.” This means you can significantly improve your wall’s U-value (a measure of heat loss) while simultaneously enhancing its ability to manage moisture—a win-win for comfort and building health.
Unlike fitting thick insulation boards, which can create awkward details around windows and doors, an insulating plaster can be sculpted to follow the natural contours of an old wall. While it won’t achieve the same U-values as a 100mm wood fibre board, applying a 50-60mm layer of hemp-lime can make a dramatic difference to thermal comfort, eliminating cold radiant surfaces and reducing heating bills, all while adding only a couple of inches to the wall thickness. It’s an elegant, integrated solution for bringing historic homes into the 21st century without compromising their character.
Key Takeaways
- Work With, Not Against: Old homes are designed as breathable systems. Use materials like lime that manage moisture, rather than modern products that block it and cause decay.
- Systemic Thinking is Crucial: Your walls, plaster, and insulation must all be part of the same breathable system. Mixing incompatible materials (e.g., lime plaster over polystyrene insulation) will lead to failure.
- Patience is a Virtue: Lime plaster cures slowly through carbonation. Rushing the drying process with heat or dehumidifiers is the single biggest cause of cracking and failure.
Is the Premium Price of Lime Plaster Worth It for Dry Walls?
There is no denying that, on paper, lime plastering is a more expensive undertaking than a standard gypsum skim. The material costs can be higher, and the labour-intensive, multi-stage application process requires skilled tradespeople who command a higher rate. In England, you can expect to pay a premium, with professional lime plastering often quoted in the range of £65–£140 per square metre. This initial outlay can be a significant factor for any renovation budget and often leads people to question if it’s truly necessary.
However, this comparison is fundamentally flawed because it compares two completely different things. A gypsum plaster job is a cosmetic finish. A lime plaster job is an investment in a high-performance moisture management system that protects the very structure of your home. The cost of not using lime is not zero; it’s the future cost of dealing with spalling brickwork, rotten timbers, persistent damp, and the eventual need to hack off the failed modern plaster and do the job correctly. It’s the cost of a devalued property that smells of damp and is unhealthy to live in.
When viewed as a long-term investment, the value proposition of lime becomes clear. It creates a healthy, comfortable living environment, free from the condensation and mould associated with sealed walls. It preserves the historic and monetary value of your property by protecting its original fabric. The gentle, undulating character of a hand-applied lime finish also adds a unique aesthetic quality that a flat, lifeless gypsum skim can never replicate. The premium price is not for a plaster; it’s for peace of mind and the longevity of your home.
Ultimately, choosing lime is choosing to be a custodian of your property, not just an owner. It is an act of respect for the original craftsmanship and an intelligent decision to ensure its survival. For renovators of pre-1919 homes, the question is not whether you can afford to use lime plaster, but whether you can truly afford not to.