Squashing loft insulation under floorboards doesn’t just reduce its efficiency; it actively creates a pathway for heat loss and damaging condensation that can rot your roof structure.
- Compressing mineral wool insulation from the recommended 270mm down to 100mm (the height of a joist) can slash its thermal performance by over 50%.
- Blocking the ventilation gap at the eaves to fit insulation is a primary cause of interstitial condensation, leading to damp and timber decay within years.
Recommendation: Your immediate priority is to remediate the issue by restoring the full insulation depth and ensuring a clear, continuous 50mm air gap is present at all eaves.
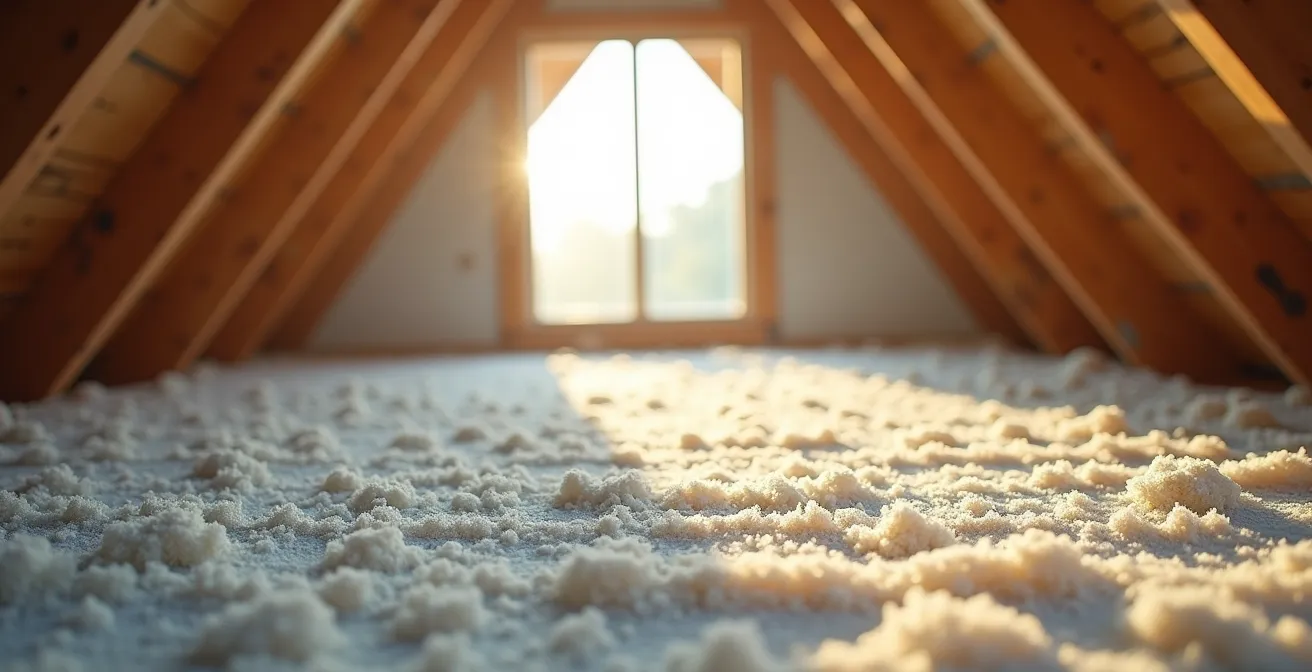
For many homeowners in England, the loft is valuable storage space. The common solution is to lay boards directly over the joists, a decision that often involves squashing the existing mineral wool insulation flat to make way. The prevailing wisdom suggests this is a minor compromise—a slight reduction in thermal efficiency in exchange for precious storage. This assumption is not just wrong; it’s dangerous. Compressing your loft insulation doesn’t just make it less effective; it fundamentally changes how your roof system performs, potentially turning a money-saving feature into a costly liability.
The problem goes far beyond simple heat loss. When insulation is compressed, its structure of trapped air pockets—the very feature that gives it its insulating power—is destroyed. This creates a “thermal bypass,” allowing heat to escape far more easily. More critically, it creates cold spots on the underside of your new loft floor. As warm, moist air from the house below rises, it hits these cold surfaces and condenses, leading to a hidden damp problem known as interstitial condensation. This isn’t just a bit of moisture; it’s a slow-acting poison for your home’s structure, creating the perfect environment for mould and timber rot.
This article serves as a corrective audit for homeowners who have already boarded their lofts. We will move beyond the simple “don’t do it” advice and delve into the specific consequences of this common mistake. We will quantify the performance loss, explain the mechanism of roof-damaging condensation, and provide a clear, step-by-step remediation plan. You will learn not only why 270mm is the standard but how to achieve it safely, how to fix the critical ventilation errors, and how rectifying this issue can significantly boost your home’s EPC rating. It’s time to stop thinking of it as “just squashed insulation” and start seeing it as a critical home maintenance failure that requires immediate attention.
This guide provides a comprehensive audit of your loft insulation. It explains the critical mistakes, the risks they pose, and the correct procedures for remediation to ensure your home is safe, warm, and efficient.
Summary: An Audit of Compressed Loft Insulation
- Why Does Your Semi-Detached House Lose 30% of Its Heat Through the Roof?
- Is 270mm Really the Magic Number for Mineral Wool in UK Lofts?
- The Loft Insulation Mistake That Causes Roof Rot Within Years
- Rolls or Loose Fill: Which Is Better for Lofts with Complex Joists?
- How to Install Mineral Wool Without Itching for Days Afterwards?
- How to Safely Insulate Over Downlights to Prevent Fire Risks?
- How to Gain 15 EPC Points Without Installing a Heat Pump?
- How to Check Your Eligibility for the £7,500 Boiler Upgrade Scheme?
Why Does Your Semi-Detached House Lose 30% of Its Heat Through the Roof?
Before addressing the problems of compression, it’s essential to understand what’s at stake. In a typical home, the roof is the single largest source of heat loss. Because warm air rises, an uninsulated or poorly insulated loft acts like an open window, allowing the heat you’ve paid for to escape directly into the atmosphere. According to experts, this is not a minor issue; the Energy Saving Trust confirms that homes lose approximately 25% of their total heat through the roof. For a semi-detached house, this represents a significant and continuous financial drain.
This heat loss is a direct consequence of thermal transfer. Your central heating system works to create a comfortable temperature differential between the inside of your home and the cold air outside. Without an effective thermal barrier in the loft, that heat simply conducts through the plasterboard ceiling and radiates away. The result is a home that feels colder, has more draughts, and requires the boiler to work harder and burn more fuel just to maintain a stable temperature. This inefficiency is reflected directly in your energy bills.
The financial impact is substantial. A case study based on July 2025 energy prices illustrates that a typical gas-heated semi-detached house in England can save up to £285 annually simply by installing correct and uncompressed loft insulation. Therefore, when you compress insulation, you are not just making a small compromise; you are directly sacrificing a significant portion of these potential savings and resigning yourself to higher energy bills for years to come.
Is 270mm Really the Magic Number for Mineral Wool in UK Lofts?
The figure of 270mm for mineral wool insulation is not an arbitrary number; it is the recommended depth specified in UK Building Regulations to achieve a target thermal performance, known as a U-value. A U-value measures how quickly heat is lost through a material. The lower the U-value, the better the insulator. Current regulations for new or refurbished lofts aim for a U-value of 0.16 W/m²K or less. Achieving this requires laying a 100mm layer of insulation between the joists, followed by a 170mm layer rolled out at a right angle over the top of the joists.
This two-layer cross-hatching method is critical. The first layer deals with heat loss through the ceiling area, but the timber joists themselves are poor insulators and act as a “thermal bridge,” allowing heat to escape. The second, top-up layer covers these joists, creating a complete, unbroken thermal blanket that dramatically reduces this thermal bypass. When you squash this 270mm blanket down to the 100mm height of the joists to fit flooring, you are not just reducing its depth; you are completely eliminating the benefit of that crucial second layer and re-exposing the thermal bridges, halving its effectiveness.
While 270mm is the standard for compliance and significant savings, it is also important to understand the law of diminishing returns. The greatest savings come from insulating a completely empty loft. Topping up an existing installation yields smaller, though still valuable, savings.
| Current Depth | Target Depth | Annual Savings | Payback Period |
|---|---|---|---|
| 0mm | 270mm | £380-590 | 2-3 years |
| 120mm | 270mm | £55 | 17 years |
| 200mm | 270mm | £25 | 20+ years |
| 270mm | 400mm | £10-15 | 30+ years |
This data from an Energy Saving Trust analysis shows that while going from nothing to 270mm has a rapid payback, the financial case for insulating beyond 270mm is weak. The key takeaway for a homeowner with a boarded loft is that restoring the compressed insulation back to its full 270mm depth is where the real value lies.
The Loft Insulation Mistake That Causes Roof Rot Within Years
The most dangerous and costly consequence of incorrect loft insulation is not heat loss, but structural damage from condensation. This occurs when homeowners, in their eagerness to achieve full coverage, push insulation tightly into the eaves, completely blocking the ventilation pathway. This single mistake is a primary cause of roof timber rot in UK homes. Your roof is designed to breathe. A continuous flow of outside air must be able to enter at the eaves, travel up through the loft space, and exit at the ridge. This airflow removes the warm, moist air that inevitably rises from kitchens and bathrooms.
When you block this gap, you trap that moisture inside the cold roof space. As this humid air comes into contact with the cold underside of the roof felt and timber rafters, it reaches its dew point and condenses into liquid water. This is interstitial condensation, and because it happens out of sight, it can cause catastrophic damage before it’s ever noticed. The timber joists, rafters, and roof battens absorb this moisture, creating the perfect conditions for fungal decay (wet and dry rot) to take hold, which can severely compromise your home’s structural integrity.
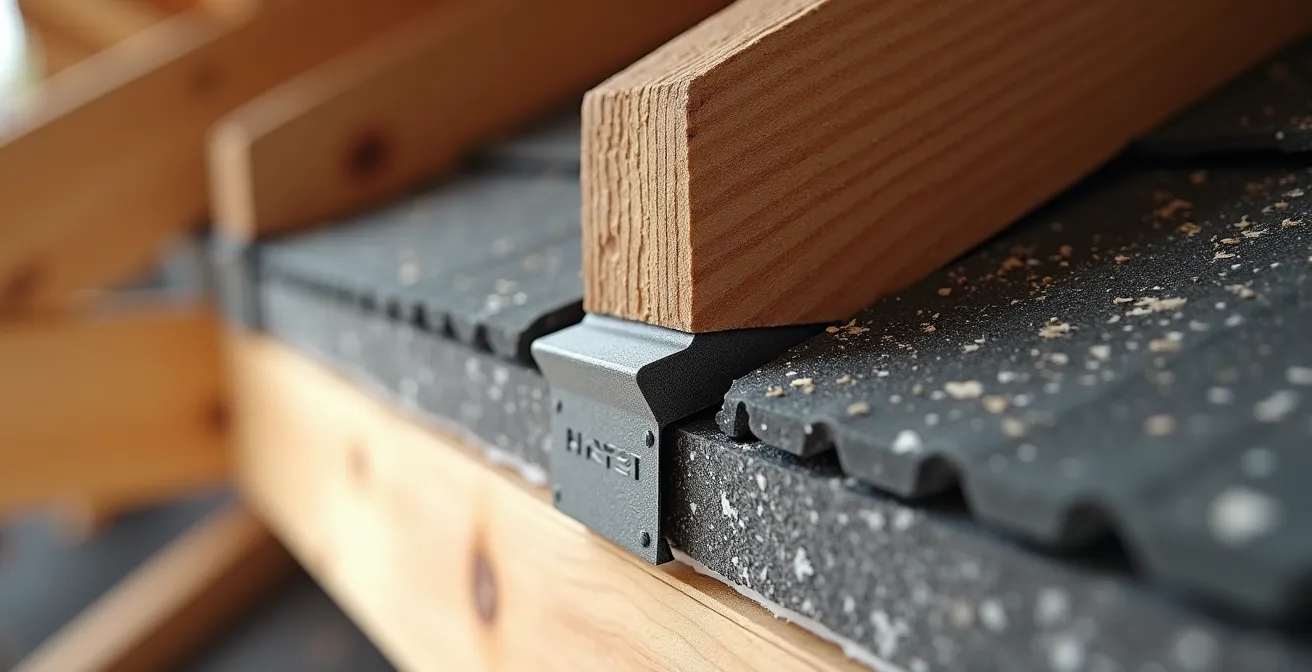
To prevent this, UK loft insulation regulations mandate maintaining a 50mm minimum gap between the top of the insulation and the underside of the roofing felt at the eaves. This is not optional. The best practice is to install eaves ventilation baffles or protectors *before* the insulation is laid. These plastic trays sit between the rafters and create a permanent, unblockable channel for air to flow freely.
The experts at Loft Restore Manchester confirm the severity of this issue in their guide to building regulations, stating:
Installing insulation that blocks essential eaves ventilation creates condensation risks and potential structural damage.
– Loft Restore Manchester, Building Regulations Part L Guide 2025
If your loft is boarded, it is critical to audit this area. You must ensure that the insulation has not been forced into the eaves, and if it has, remediation is not just recommended—it is essential to protect the long-term health of your property.
Rolls or Loose Fill: Which Is Better for Lofts with Complex Joists?
When planning to remediate a poorly insulated loft, choosing the right type of insulation is key to a successful outcome. The two primary options are mineral wool rolls and loose-fill insulation (often made of treated cellulose or mineral wool fibres). The best choice depends entirely on the specific characteristics of your loft space, particularly the regularity of the joists and the presence of obstacles.
For most modern homes, particularly those built from the 1970s onwards with standard trussed rafters, mineral wool rolls are the most cost-effective and straightforward option. They are easy to handle, can be cut to fit snugly between joists, and provide a stable base for the second cross-laid layer. If your goal is to use the loft for storage by raising the floor level with loft legs, rolls provide the firm, consistent depth needed to sit underneath the new raised deck without compression.
However, for older properties, such as Victorian or Edwardian houses, lofts often feature irregular joist spacing, extensive pipework, and other obstructions. In these complex spaces, loose-fill insulation is superior. It is blown into the space using a specialist machine, allowing it to flow into every awkward gap and corner, creating a seamless, monolithic thermal barrier with no gaps. It perfectly covers complex pipework and electrical cables, eliminating the thermal bridges that are difficult to avoid when cutting rolls around obstacles. The trade-off is that it does not provide a stable base for boarding, making it suitable only for lofts where storage is not the primary goal.
The following table provides a clear guide for different UK property types:
| Property Type | Best Option | Key Advantages | Installation Time |
|---|---|---|---|
| 1970s Standard Trussed Rafters | Rolls | Easy installation, uniform coverage, cost-effective | 3-4 hours |
| Victorian Irregular Joists | Loose Fill | Fills awkward spaces, complete coverage around obstacles | 2-3 hours |
| Loft with Storage Use | Rolls | Stable base for boarding, maintains thickness | 4-5 hours |
| Complex Pipework Present | Loose Fill | Complete thermal barrier, no gaps around services | 2-3 hours |
How to Install Mineral Wool Without Itching for Days Afterwards?
Working with mineral wool insulation is notoriously unpleasant due to the fine glass or rock fibres that can become airborne and irritate the skin, eyes, and respiratory system. However, with professional-grade preparation and technique, you can minimise exposure and avoid the dreaded post-installation itch. This is not a job for shorts and a T-shirt; full Personal Protective Equipment (PPE) is non-negotiable.
The first line of defence is to prevent the fibres from touching your skin or being inhaled. This means wearing disposable overalls with a hood, tight-fitting safety glasses or goggles, thick work gloves, and a dust mask rated FFP1 minimum (FFP3 is recommended for prolonged work). A bump cap is also wise to protect your head in tight loft spaces. This gear creates a complete barrier between you and the insulation fibres.
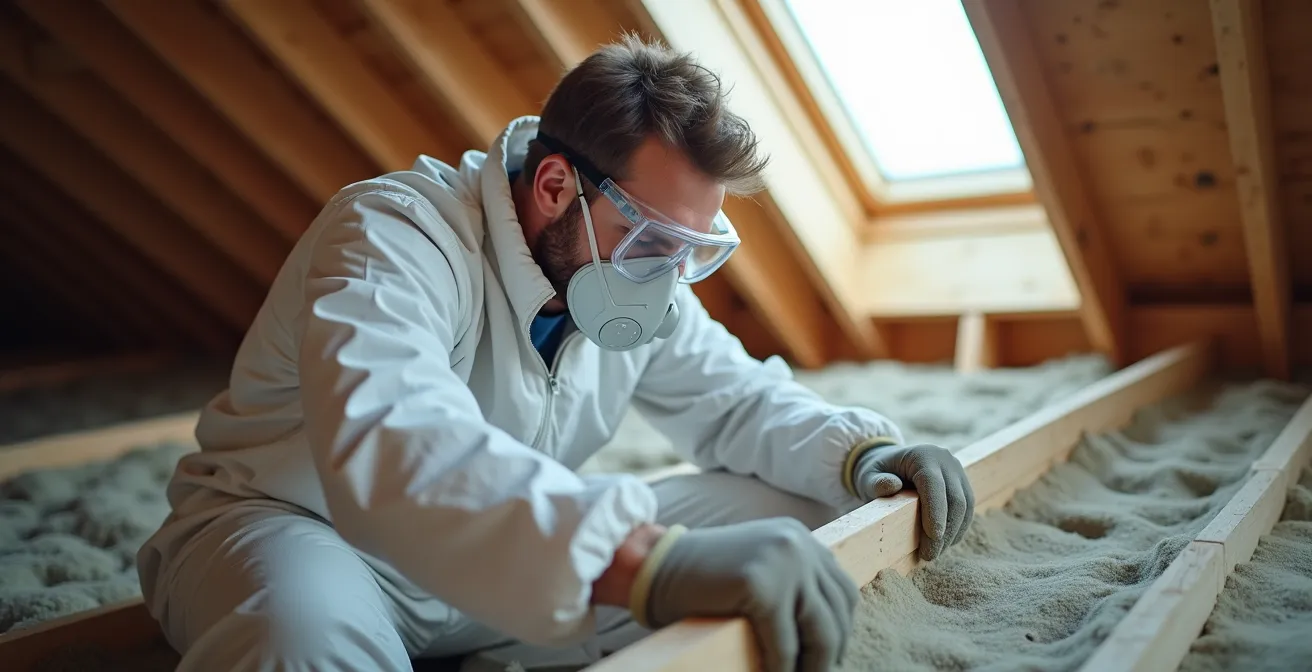
Your installation technique also plays a crucial role. Keep the insulation inside its compressed packaging for as long as possible and only open it in the area where it will be installed. This dramatically reduces the release of loose fibres into the loft space. Always plan your work to start at the furthest point from the loft hatch and work backwards towards it. This ensures you are not crawling over or disturbing the insulation you have just laid, which would send clouds of fibres into the air.
A professional approach includes the following steps for a safe and clean installation:
- Gear Up: Put on full PPE including overalls, safety glasses, gloves, bump cap, and a suitable dust mask before even opening the loft hatch.
- Minimise Fibre Release: Keep the insulation rolls in their packaging until you are in position to install them. Unpack them carefully.
- Work Backwards: Start laying insulation at the point furthest from the loft hatch and work your way back to avoid disturbing laid material.
- Clean Up Immediately: After finishing, carefully remove your overalls in the loft if possible, and bag them. Use a HEPA-filtered vacuum cleaner to thoroughly clean the loft hatch, landing, and stairs to capture any stray fibres before they spread through the house.
How to Safely Insulate Over Downlights to Prevent Fire Risks?
One of the most critical safety hazards in a loft is the interaction between insulation and recessed downlights. Older halogen downlights (like GU10 models) generate an immense amount of heat, which needs to dissipate freely. Covering these types of fittings directly with insulation creates a highly effective heat trap, which can lead to overheating, failure of the light fitting, and in the worst-case scenario, ignition of the insulation or surrounding timber joists. This is a serious fire risk that must be addressed correctly.
Modern integrated LED downlights run significantly cooler, but they still produce heat that can shorten their lifespan if not managed. Therefore, regardless of the type of downlight, you must never lay insulation directly over them without taking proper precautions. The manufacturer’s instructions for any recessed light fitting will specify a minimum clearance that must be maintained from any insulating material—this is often around 75mm, but you must check the specific requirements for your fittings.
The professional solution is to install a loft cap or insulation protection cover for each downlight. These are fire-rated, dome-shaped protectors that are placed over the light fitting from above. They create a safe air pocket around the light, allowing heat to dissipate while enabling you to run insulation up to and over the cover, thus maintaining the integrity of your thermal barrier. They prevent the insulation from ever coming into direct contact with the hot fitting. Before covering any electrical fittings, it is highly recommended to have a Part P certified electrician assess them to ensure they are safe and suitable for their location.
Your Action Plan: Fire-Safe Downlight Insulation Protocol
- Identify Fittings: Before you begin, identify the type of all downlights in your ceiling. Check if they are high-heat halogens or modern, cooler LEDs.
- Check Clearances: Consult the manufacturer’s instructions for each fitting to confirm the minimum required air gap between the fitting and any insulation (typically 75mm).
- Install Protectors: Purchase and install an appropriate loft cap or insulation protection cover over every single downlight. Ensure they are sized correctly for your fittings.
- Ensure Air Pocket: Verify that each cover creates a sufficient air pocket for heat dissipation while allowing insulation to be laid closely around and over it.
- Get an Electrical Check: For ultimate peace of mind, have a Part P certified electrician inspect all wiring and fittings in the loft before you proceed with covering them.
Key Takeaways
- Compressing 270mm of insulation to 100mm can reduce its effectiveness by over 50% by creating thermal bridges.
- Blocking the 50mm ventilation gap at the eaves is a critical error that traps moisture and leads to timber rot.
- Restoring correct insulation depth and ventilation can add 10-15 points to your home’s EPC rating, increasing its value.
How to Gain 15 EPC Points Without Installing a Heat Pump?
Improving your home’s Energy Performance Certificate (EPC) rating is one of the most effective ways to increase its value and appeal to potential buyers. While major upgrades like heat pumps offer substantial gains, they also come with significant costs. A far more accessible and cost-effective strategy is to focus on your home’s fabric efficiency, and rectifying a compressed loft insulation problem is the single biggest step you can take.
An EPC assessor evaluates your home’s energy performance and provides a rating from A (most efficient) to G (least efficient). The points system behind this rating is directly influenced by insulation levels. According to industry data, simply topping up loft insulation to the recommended 270mm can add 10-15 EPC points to your score. This is a substantial jump that could easily move a property from a D rating to a C, a key threshold for many buyers and mortgage lenders. For a homeowner with a squashed, underperforming loft, removing the boards, restoring the insulation to its full 270mm depth (using loft legs if storage is still required), and ensuring correct ventilation is a guaranteed route to a higher rating.
This single action can be bundled with other low-cost “quick wins” to maximise your EPC score. A comprehensive draught-proofing of all windows and external doors can add another 2-3 points. If you have an older hot water cylinder, fitting it with a high-quality insulation jacket can boost your score by a further 2-3 points. Finally, switching all remaining incandescent or halogen bulbs to low-energy LEDs will contribute another 1-2 points. Combined, these fabric-first improvements can yield an improvement of 20 points or more, transforming your home’s energy profile without the expense of major renewable technology installations.
Crucially, when the EPC assessor visits, you must provide documentation for all improvements. Keep receipts for insulation, loft legs, and any contractor invoices to prove the work has been done to standard. This ensures you receive the full credit you are due for your efforts.
How to Check Your Eligibility for the £7,500 Boiler Upgrade Scheme?
As homeowners look to improve their energy efficiency, many are interested in government grants like the Boiler Upgrade Scheme (BUS), which offers up to £7,500 towards the cost of an air source or ground source heat pump. However, a critical and often misunderstood requirement is that your home must have adequate “fabric efficiency” *before* you can even qualify. This brings the issue of your loft insulation sharply into focus.
Heat pumps work most efficiently in homes that lose heat very slowly. Therefore, MCS certified installers, who are the only ones authorised to carry out work under the scheme, have a duty to verify that your home is suitable. A key part of this is checking your EPC. To be eligible for the BUS, you must have a valid EPC issued within the last 10 years, and it must have no outstanding recommendations for loft or cavity wall insulation. If your EPC survey identified your loft insulation as inadequate—or if you have squashed it under boards, rendering it ineffective—you will be required to rectify this at your own expense before a heat pump installation can be approved.
This is a crucial point: the £7,500 grant covers the cost of the heat pump and its installation only. It does not cover the cost of any prerequisite insulation work. You will need to fund the remediation of your loft insulation separately. The approximate professional installation of 270mm loft insulation costs around £900 for a typical semi-detached house, an investment you must make to unlock access to the larger grant. Therefore, viewing correct loft insulation not as an option, but as a mandatory gateway to future-proofing your home with technologies like heat pumps, is the correct approach.
Fixing your loft insulation is the foundational first step on the journey to a low-carbon home. It ensures any further investments, whether grant-funded or not, will perform as efficiently as possible.
To protect your property, reclaim your energy savings, and unlock future upgrades, the next logical step is to conduct a thorough audit of your loft space using these guidelines and schedule the necessary remediation work without delay.
Frequently Asked Questions on the Boiler Upgrade Scheme
Do I need loft insulation before applying for the Boiler Upgrade Scheme?
Yes, MCS certified installers must verify your home has adequate fabric efficiency, including proper loft insulation, before installing a heat pump under the scheme.
Does the £7,500 grant cover insulation costs?
No, the Boiler Upgrade Scheme grant covers only the heat pump and its installation. Any required insulation must be funded separately by the homeowner.
What EPC requirements exist for the scheme?
You need a valid EPC issued within the last 10 years with no outstanding recommendations for loft or cavity wall insulation to qualify.