
In today’s market, the ‘character’ of a period home no longer guarantees its value; its thermal performance and mortgageability do.
- An F-rated EPC is a major red flag for mortgage lenders, directly threatening your home’s saleability regardless of its charm.
- Focusing on ‘invisible’ issues like air permeability and thermal bridging yields better results than just expensive, obvious upgrades.
Recommendation: Before spending thousands, use low-cost diagnostics to understand your home’s specific heat loss points, then prioritise breathable, targeted solutions that satisfy both buyers and lenders.
As a seller of a Victorian or Edwardian home, you’ve always banked on its unique character—the sash windows, the original floorboards, the ornate fireplace. For decades, these features commanded a premium. But as the first chill of autumn sets in, a different, more pressing thought creeps in: with energy bills soaring, is the very ‘character’ that makes your home special now its greatest financial liability? It’s a worry keeping many period homeowners awake at night, long after the heating has clicked off.
The common advice is often generic and unhelpful. You’re told to insulate the loft or get a new boiler, solutions that are either obvious or eye-wateringly expensive. Others might say “don’t worry, buyers will always want period charm.” This is a dangerous oversimplification. The market has fundamentally shifted. The Energy Performance Certificate (EPC), once a mere formality, is now a critical document scrutinised by buyers and, more importantly, by their mortgage lenders.
But what if the key to unlocking your home’s true value isn’t about erasing its character with plastic windows or spending a fortune to chase an EPC rating? What if it’s about becoming a thermal detective? This article will guide you through a more intelligent approach. We will move beyond the platitudes to uncover the invisible culprits of heat loss, understand the very real risks of the ‘EPC trap’ that can lead to damp, and reveal how strategic, often low-cost, interventions can make your period home not just saleable, but highly desirable in the modern market.
To navigate this complex landscape, we will explore the critical questions you should be asking. This guide provides a structured path from diagnosing the problem to implementing cost-effective solutions that protect both your property’s heritage and its market value.
Summary: A Seller’s Guide to Navigating EPCs and Period Property Value
- Why Does Your Period Home Stay Cold for Days Once the Heating Is Off?
- How to Find the Invisible Cold Spots That Cause Black Mould in Corners?
- Open Fire vs Wood Burner: How Much Heat Are You Losing Up the Chimney?
- The EPC Risk: Will Banks Refuse to Mortgage Your Dream Period Home?
- How to Sand and Seal Original Floorboards Without Creating Draughts?
- How Much More Do Retrofitted Homes Sell for in Your Region?
- The EPC Trap: Measures That Improve Ratings But Increase Damp Risk
- How to Improve Your EPC Rating from D to C for Under £3,000?
Why Does Your Period Home Stay Cold for Days Once the Heating Is Off?
The lingering chill you feel in your period home, long after the thermostat is off, isn’t just in your imagination. It’s a physical phenomenon rooted in two key concepts often missed by standard energy assessments: thermal mass and air permeability. Unlike modern timber-frame houses, Victorian and Edwardian properties were built with solid, dense materials like brick and stone. This high thermal mass acts like a sponge for cold. Once the building fabric gets cold, it takes a huge amount of energy and time to warm it back up.
The second, more significant culprit is air permeability. These homes were designed to be ‘leaky’ to manage moisture from fires and breathing. A typical Victorian home can experience a complete air change every 90 minutes. This constant influx of cold air relentlessly works against your heating system. You’re not just heating a room; you’re attempting to heat the entire neighbourhood, one gust at a time. The cumulative effect of small, unsealed gaps—letterboxes, keyholes, and especially chimneys—creates a constant flow of cold air that sabotages your comfort and your bills.
A real-world example from Chorlton, Manchester, demonstrates the power of tackling this. The Thompson family, living in an 1895 Victorian terrace, saw their winter heating bills drop by 19% after a focused campaign of draught-proofing. By spending just £210 on brush strips for sash windows, chimney balloons, and sealing floorboard gaps, their monthly bill fell from £220 to £178. This wasn’t about massive insulation projects; it was about systematically plugging the small leaks that, together, created a huge problem. This demonstrates that understanding and controlling airflow is the first and most critical step in improving your home’s thermal performance.
Before you even consider expensive insulation, you must first diagnose and control where the air is moving through your home. It’s the single most cost-effective action you can take.
How to Find the Invisible Cold Spots That Cause Black Mould in Corners?
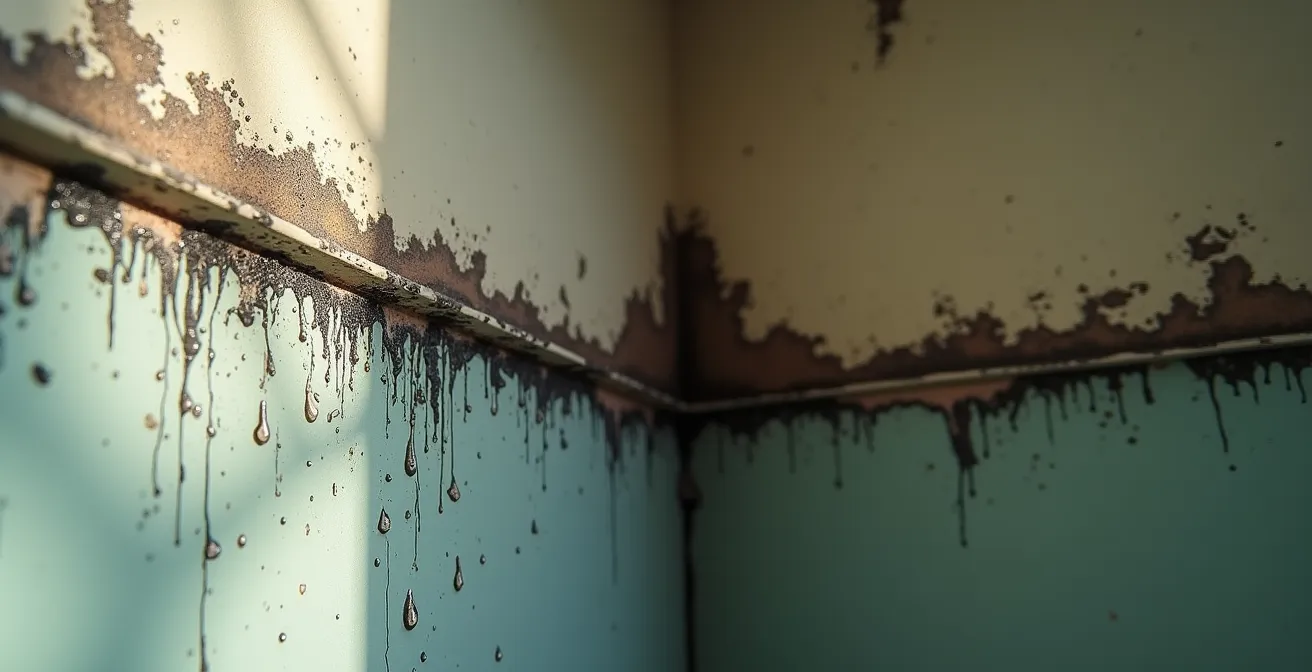
That persistent patch of black mould in the corner of a bedroom isn’t a sign of poor housekeeping; it’s a physical manifestation of an invisible problem called thermal bridging. This occurs where a part of the building structure is less insulated or more conductive than its surroundings, creating a ‘bridge’ for heat to escape and cold to enter. In Victorian homes, these are typically found at the junctions of walls and floors, around window reveals, and in corners where external walls meet. These cold spots cause the relative humidity of the air to rise locally, leading to condensation and, inevitably, mould growth.
You don’t need to be a building surveyor with expensive equipment to locate these problem areas. The key is to become a ‘thermal detective’ yourself. The most effective tool is a simple, inexpensive infrared thermometer. By methodically mapping the temperature of your internal walls on a cold morning, you can reveal the hidden patterns of heat loss that are costing you money and affecting your home’s health. A sudden drop of 3°C or more is a clear indicator of a thermal bridge that needs attention.
This process of identifying the specific, localised cold spots is far more powerful than broad-stroke solutions. It allows for targeted interventions. For example, a cold spot at the base of a wall might be addressed by ensuring skirting boards are properly sealed, while a cold window reveal could benefit from insulated plasterboard or even thermal lining paper. By finding the root cause, you move from endlessly cleaning mould to permanently preventing its return. This diagnostic approach puts you in control, allowing you to invest your money precisely where it will have the most impact on both comfort and your EPC rating.
Your action plan: DIY thermal bridge detection
- Purchase an infrared thermometer for under £20 from any major DIY store.
- Conduct your survey on a cold, still winter morning before sunrise for the most accurate and pronounced results.
- Map temperature variations every 30cm along external walls, paying special attention to corners, window reveals, and where floors meet walls.
- Document your readings to identify patterns. Consistent temperature drops of 3°C or more are the tell-tale signs of thermal bridges.
- Mark these problem areas on a simple floor plan. This map will guide your targeted treatment with draught-proofing or localised insulation.
This simple act of data collection transforms you from a passive victim of a cold house into an informed homeowner ready to make strategic, effective improvements.
Open Fire vs Wood Burner: How Much Heat Are You Losing Up the Chimney?
The romantic allure of an open fire is one of the quintessential features of a period home. However, from a thermal performance perspective, it’s akin to leaving a window wide open while your heating is on full blast. An open fireplace is a primary source of heat loss, even when it’s not lit. It’s a direct, unbaffled flue from your warm living room to the cold air outside. When you do light a fire, the situation is not much better.
The hard numbers are stark. The average open fire is astonishingly inefficient. It is a common misconception that the heat radiating into the room is a net gain. In reality, an open fire is only about 15% efficient. This means for every £1 of fuel you burn, you are only getting 15p worth of usable heat into the room. The remaining 85p is effectively going straight up the chimney, pulling vast quantities of your already-warmed air with it. It’s an expensive way to heat the sky.
In contrast, a modern, Ecodesign-compliant wood-burning stove is a sealed system. They operate at efficiencies of 80% or more. This means they use far less fuel to produce significantly more heat, and when not in use, they don’t act as a passive heat drain on the room. While the aesthetic is different, the financial and comfort implications are undeniable. If you have an unused fireplace, it is a major thermal liability. The Department for Energy Security and Net Zero estimates that simply blocking an unused chimney with a balloon or cap can save £35 a year, but the real benefit is the immediate improvement in comfort by stopping the constant flow of cold air.
For any seller, addressing the chimney—either by installing a high-efficiency stove or by properly sealing it if unused—is a clear and demonstrable step towards improving the home’s thermal performance and appeal to savvy buyers.
The EPC Risk: Will Banks Refuse to Mortgage Your Dream Period Home?
The most significant shift in the property market for period homeowners isn’t aesthetic trends; it’s the hardening attitude of mortgage lenders towards energy inefficiency. An EPC rating of F or G is no longer just a colourful bar on a report; it’s a major financial red flag that can derail a sale. Lenders are increasingly viewing poorly-rated properties as a risk, both due to the potential for future government regulations and the immediate impact of high energy bills on a borrower’s affordability.
The scale of this issue is immense. According to data from the Ministry of Housing, a staggering 58.6% of properties in England and Wales currently fail to meet the proposed EPC C requirement that is widely expected to become a regulatory benchmark. This means that over half of the housing stock, with period properties disproportionately represented, is on a collision course with lending criteria. Major lenders like Halifax are already offering enhanced borrowing on A or B-rated properties while potentially reducing loan amounts for F or G-rated homes, factoring in the higher running costs.

This is where sellers of charming but draughty homes are most vulnerable. A potential buyer may love your property and have a mortgage offer in principle, only for the lender’s surveyor to downgrade the valuation or refuse the loan outright based on the poor EPC rating. However, there is a proactive strategy. The key is to demonstrate financial awareness and a clear plan. Instead of waiting for a bad survey, you can front-foot the issue. Presenting a costed retrofit plan alongside the property details can be a powerful tool. A plan showing that a D-to-C rating jump can be achieved with specific, costed measures like loft insulation (£500) and a boiler upgrade (£2,500) shows a lender that the “problem” has a known and affordable solution. This transforms the property from a “risk” to a “project with potential” in the eyes of the bank.
By preparing a clear, costed improvement plan, you provide the evidence and confidence that lenders need, ensuring your period home’s character remains an asset, not a liability.
How to Sand and Seal Original Floorboards Without Creating Draughts?
Restoring original floorboards is a project beloved by period homeowners, promising to add authentic charm. However, a poorly executed job can turn this dream feature into a primary source of uncomfortable draughts and significant heat loss. The gaps that appear between old boards, often widening in winter as the wood contracts, act as direct conduits for cold air from the sub-floor void. Simply filling these gaps with a rigid filler is a common mistake; it’s a short-term fix that will crack and fall out as the floorboards naturally move with seasonal changes in humidity.
The professional approach focuses on tackling the problem at its source: the uncontrolled airflow from below. The first step is to lift a few sample boards to inspect the sub-floor void. This allows you to check for damp and to understand what you’re working with. The most effective solution involves creating a suspended insulation layer. This is often done by stapling a waterproof, breathable membrane between the joists, creating a hammock-like structure. This membrane is then filled with a suitable insulation material, like eco-friendly Pavaflex, which dramatically reduces airflow while still allowing the structure to breathe.
A case study of a Victorian end-terrace in St Albans highlights this method’s success. The owners suspended a breathable membrane and installed 160mm of Pavaflex insulation. They then meticulously sealed the crucial junction between the floor and the wall with specialist Pro Clima Contega tape. The result was a dramatic reduction in draughts and a tangible feeling of “cosiness” without compromising the building’s essential breathability. For the gaps between boards on the surface, a flexible solution is key. A mix of sawdust from the sanding process and a flexible binder like Lecol 7500, or carefully cut wooden slithers, will move with the floor and provide a lasting seal. This methodical, breathable approach ensures your beautiful floorboards are a source of warmth and character, not a constant, chilly reminder of the void beneath.
This method respects the nature of an old building, managing airflow and improving comfort without creating new problems like trapped moisture.
How Much More Do Retrofitted Homes Sell for in Your Region?
This is the critical question every seller asks: what is the real financial return on investment for energy efficiency upgrades? While national headlines often quote blanket percentages, the truth is far more nuanced and hyper-local. The “green premium” is not a uniform figure; it varies significantly from one postcode to another, depending on the local housing stock, buyer demographics, and prevailing energy costs. Relying on a national average is a mistake; the only number that matters is the one for your specific street.
In a cautious market, where major forecasters like Savills have revised UK house price growth for 2025 down to just 1.0% growth due to market caution, every percentage point of value counts. An energy-efficient home stands out. It offers buyers something tangible and increasingly valuable: lower running costs and financial resilience. A home that has jumped from an E or F rating to a C is not just more comfortable; it’s cheaper to live in from day one, and this is a powerful selling point that translates directly into its market value.
So how do you calculate this for your area? You must become a local market analyst. The data is publicly available. Start with the Land Registry’s UK House Price Index, which allows you to drill down into specific postcodes. Here, you can compare the actual sold prices of properties of a similar size, type, and condition, but with different EPC ratings. Cross-reference this historical data with current asking prices on portals like Rightmove. Look for two identical-looking Victorian terraces on the same road—one at EPC E, the other at C. What’s the percentage difference in their asking price? And how long does each take to go under offer? This hyper-local analysis will give you a far more accurate and powerful understanding of the retrofit premium in your market than any national report ever could.
This DIY research is the most important financial due diligence you can do before putting your home on the market or investing in upgrades.
The EPC Trap: Measures That Improve Ratings But Increase Damp Risk
In the rush to improve an EPC rating, there lies a significant and costly trap. Many standard, modern insulation measures are designed for modern, sealed buildings and can be disastrous when applied to a period property. Victorian homes, with their solid walls, were designed to ‘breathe’—they manage moisture by allowing it to pass through the building fabric and evaporate away. The ‘EPC trap’ is when a homeowner, chasing a better letter grade, inadvertently blocks this process, leading to interstitial condensation, damp, and structural decay.
The most common culprits are non-breathable insulation materials like PIR (polyisocyanurate) foam boards or impervious cement-based renders applied to the outside of solid brick walls. While these measures are excellent at stopping heat transfer and will certainly boost your EPC score on paper, they also create a vapour barrier. Moisture that was once able to escape is now trapped within the wall structure. Over a winter, this can lead to the brickwork becoming saturated, causing frost damage, and driving dampness into the interior of your home. You may have a C-rated property, but you also have a damp, crumbling one.
The correct approach for solid-walled properties is to work *with* the building’s nature, not against it. This means using breathable insulation systems. Materials like wood fibre, cork, or lime-hemp plaster are vapour-permeable. They improve thermal performance while still allowing the wall to manage moisture as it was designed to. This is the fundamental difference between a successful period property retrofit and a catastrophic failure. Before you let any builder start work, you must be armed with the right questions to ensure they understand this crucial principle.
Builder’s Red Flag Checklist: Your defence against the EPC Trap
- Ask: “What is the vapour permeability rating of your proposed insulation system?” If they don’t know or dismiss the question, they are the wrong builder.
- Request: “Can you show me case studies of similar pre-1919 properties you have successfully retrofitted with this system?”
- Verify: “How will balanced ventilation be maintained or improved after the insulation is installed?” Sealing a house requires a ventilation strategy.
- Check: “Could you explain the difference between breathable and non-breathable construction for a house like mine?” This tests their fundamental understanding.
- Confirm: “Will you be conducting a moisture risk assessment before starting the work?” This should be a non-negotiable first step.
A higher EPC rating is worthless if it comes at the cost of a damp, unhealthy home. Insist on a breathable approach to safeguard your investment.
Key takeaways
- The perceived value of ‘period character’ is now secondary to thermal performance and mortgageability due to high energy costs.
- Diagnosing and fixing ‘invisible’ issues like thermal bridging and air permeability offers a higher return than many expensive, obvious upgrades.
- Using non-breathable, modern insulation on solid-walled period homes is a major risk that can lead to damp, even if it improves the EPC rating on paper.
How to Improve Your EPC Rating from D to C for Under £3,000?
The leap from an EPC rating of D to C is one of the most valuable improvements you can make. It moves your property from the “average” to the “good” category in the eyes of buyers and lenders. With the average home in England and Wales currently rated Band D, achieving a C makes your property stand out as a more efficient and affordable home to run. The good news is that this significant jump is often achievable with a focused, strategic investment of under £3,000, provided you prioritise the right measures.
Forget expensive fantasies like ground-source heat pumps or solar panels for now. The journey from D to C is built on a foundation of solid, cost-effective basics that deliver the biggest impact for the lowest outlay. It’s a game of priorities. The first and most crucial step for almost any period home is topping up loft insulation to the recommended 270mm and undertaking a thorough draught-proofing campaign. This combination offers a huge EPC point gain and significant bill savings for a very low initial cost.
Next, focus on controlling your heating system. Installing a smart thermostat and adding Thermostatic Radiator Valves (TRVs) to all radiators allows you to heat only the rooms you are using, to the temperature you want. This level of control is rewarded by the EPC assessment methodology. Finally, if your boiler is old and inefficient, replacing it with a modern A-rated condensing boiler will provide the single biggest jump in your EPC score, though it is the most expensive item on the list. The key is to approach this as a hierarchy of interventions, starting with the cheapest and most impactful, as detailed in the table below.
| Priority | Measure | Cost Range | Annual Savings | EPC Impact |
|---|---|---|---|---|
| 1 | Loft insulation (270mm) + draught-proofing | £200-500 | £230 | High |
| 2 | Smart thermostats + TRVs all radiators | £500-1,200 | £150-200 | Medium |
| 3 | A-rated condensing boiler (if needed) | £1,200-3,000 | £300-400 | Very High |
| 4 | Secondary glazing (main rooms) | £800-1,500 | £100-150 | Medium |
This targeted approach ensures your investment directly translates into a more valuable, more efficient, and more sellable period home, satisfying the demands of the modern buyer and their mortgage provider.