
The persistent rattle and chill from your sash windows are symptoms of a fixable mechanical imbalance, not a sign they need replacing with modern uPVC.
- Restoring the window’s original balance and fitting modern, hidden seals can reduce air leakage by over 80%.
- Using sympathetic materials like timber and traditional cotton cords preserves the character and value of your period property.
Recommendation: Approach your windows as a complete system. By meticulously addressing the cords, seals, and paint, you can achieve better-than-new performance while honouring their historic integrity.
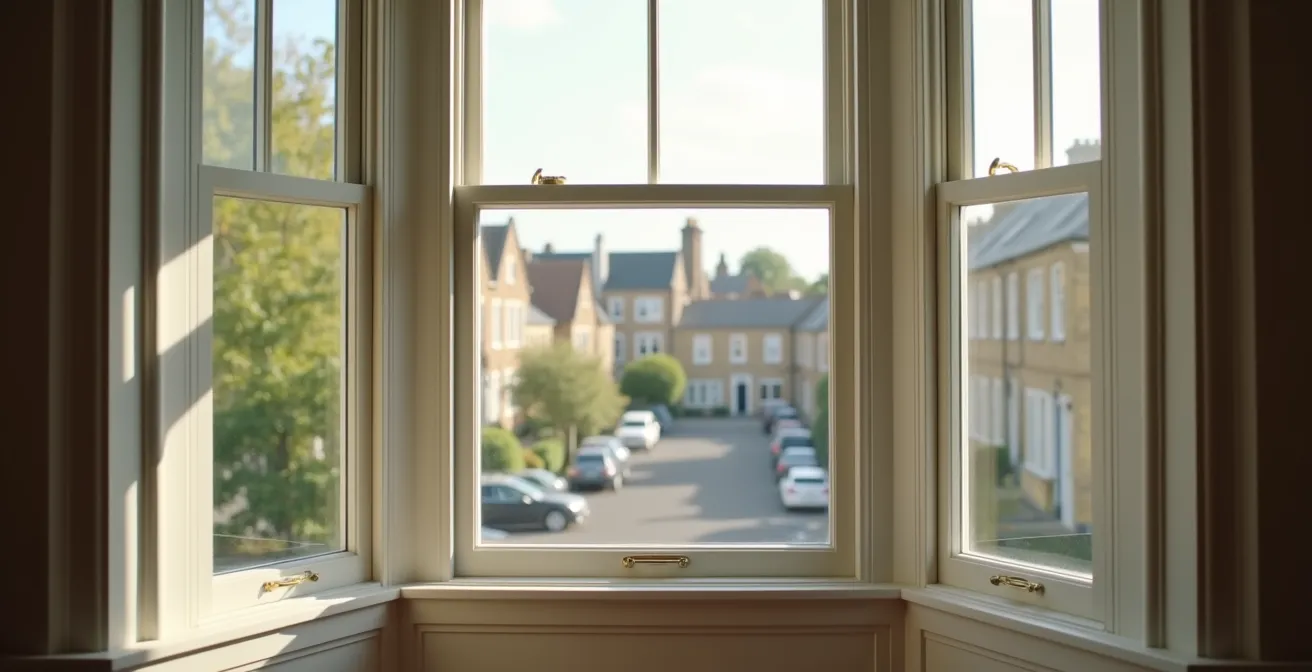
That familiar, persistent rattle of a sash window on a windy day. The noticeable cold spot you feel when you walk past it in winter. For many owners of Victorian and Edwardian homes, these are accepted discomforts, often leading to the conclusion that the only real solution is a full, costly replacement with modern uPVC units. This is a fundamental misunderstanding of what makes these windows so special, and so resilient.
The common advice is often to apply temporary, stick-on foam strips that peel away after one season, or worse, to surrender to a sales pitch for plastic replacements that can diminish your property’s character and value. But what if the rattling and draughts aren’t a sign of failure, but simply a call for a tune-up? The truth is, a traditional box sash window is a beautifully simple, robust piece of engineering. Its problems rarely stem from a flaw in its design, but from decades of paint, minor wear, and a loss of equilibrium.
The key is to stop thinking about patching symptoms and start focusing on restoring the window’s mechanical integrity. This article is not a guide to quick fixes. It is a restorer’s approach to understanding your window as a balanced system of weights, pulleys, and timber. We will meticulously break down how to service this system, using modern, sympathetic materials that enhance performance without sacrificing the soul of your home. You can achieve warmth, quiet, and smooth operation not by removing the history, but by honouring it.
For those who prefer a visual demonstration, the following video shows a professional’s method for safely removing sash components, which is the first step in any major restoration work. It provides an excellent insight into the system’s construction.
To systematically address every aspect of your windows, from their fundamental mechanics to their final thermal efficiency, this guide is structured to walk you through each critical element. The following sections provide a complete roadmap for a thorough and effective restoration.
Summary: A Comprehensive Guide to Sash Window Restoration
- Why Do Your Sash Windows Drop When You Try to Open Them?
- How to Retrofit Brush Piles into Old Sashes for a Perfect Seal?
- Timber or Plastic Parting Beads: Which Lasts Longer in UK Weather?
- The Painting Error That Glues Your Draught Strips Shut Forever
- When to Replace Cotton Cords with Nylon for Smoother Operation?
- How to Restore Original Shutters to Act as Effective Thermal Barriers?
- How to Draught-Proof Your Front Door for Under £50 Before Winter Arrives?
- Why Is Secondary Glazing Often Better Than Double Glazing for Noise Reduction?
Why Do Your Sash Windows Drop When You Try to Open Them?
When a sash window refuses to stay open or drops suddenly, it’s not a sign of age; it’s a problem of physics. The entire mechanism is a balanced system where the weight of the sash (the moving part of the window) is precisely counteracted by lead or cast-iron weights hidden within the window box. A dropped sash is a clear signal that this equilibrium has been lost. The most common culprit is often a previous, well-intentioned repair: re-glazing. Historic glass is significantly lighter than modern float glass. If a pane has been replaced without adjusting the counterweights, the sash becomes too heavy for the system to support.
Another frequent issue is friction. Over decades, multiple layers of paint can clog the pulley wheels, preventing them from turning freely. A meticulous restorer never uses oil on these, as it attracts dust and dirt, creating a gummy mess. Instead, a small amount of graphite powder is the professional’s choice to lubricate a stiff pulley. You must also differentiate between a system failure and simple surface wear. Decades of movement can polish the timber surfaces smooth, creating micro-gaps that contribute to rattles and poor operation. Addressing these root causes is fundamental to any lasting repair and is a key step in reducing air leakage. Comprehensive draught-proofing based on these principles can be highly effective; research from Historic England shows that professional solutions can achieve a 33% to 50% air leakage reduction.

As you can see in the detail of this pulley, the entire mechanism is designed for simple, effective operation. Restoring its function is about cleaning and rebalancing, not replacement. By understanding this, you shift from fighting the window to working with its intended design, which is the first principle of a sympathetic restoration.
How to Retrofit Brush Piles into Old Sashes for a Perfect Seal?
Forget the self-adhesive foam strips you find in DIY shops. For a truly effective and invisible seal, the professional standard is retrofitting brush piles. These are narrow strips containing thousands of flexible polypropylene filaments, housed within a carrier. Unlike foam, which compresses and loses its shape, these brushes adapt to the movement of the sash, creating a consistent barrier against draughts, dust, and noise while allowing for smooth operation. The results are significant; targeted research shows that comprehensive draught-sealing of a sash window can lead to as much as an 86% reduction in air infiltration.
The key to a professional job is making it a reversible intervention that respects the original timber. Instead of simply sticking a strip to the surface, a meticulous restorer routes a narrow channel directly into the staff beads, parting beads, and the sash meeting rails. The brush pile carrier is then inserted into this groove, making the seal an integral, yet hidden, part of the window.
Professional Insight: The Hidden Seal Method
The most effective and conservation-approved method involves fitting brush pile seals into purpose-routed channels. These narrow strips with tiny, flexible brushes line the gaps around the sashes and within the frame. The brushes allow the sashes to move freely while creating a formidable barrier to draughts. Because the seals are recessed into the timber, they are entirely hidden from view when the window is closed, preserving the authentic appearance. For listed properties or homes in conservation areas, this is the preferred method as it does not alter the window’s external or internal character and can be easily reversed if ever required.
This method offers a perfect seal without compromising the aesthetic integrity of the period feature. It’s the embodiment of a modern solution applied with traditional craftsmanship, ensuring the window performs better than new while looking completely original.
Timber or Plastic Parting Beads: Which Lasts Longer in UK Weather?
When overhauling a sash window, the parting beads—the small timber strips that separate the top and bottom sashes—are often replaced. This presents a critical choice: use traditional timber or opt for modern plastic (uPVC) carriers that come with pre-fitted draught seals. While plastic may seem like a low-maintenance option, a true restorer will almost always advocate for timber, especially in the damp UK climate. Timber is the authentic material; it breathes and moves with the original box frame, helping to manage moisture and prevent it from becoming trapped, which can lead to rot.
Plastic, on the other hand, is impermeable. It can trap moisture against the historic timber of the frame, potentially accelerating decay over the long term. Furthermore, using plastic components on a period window can negatively impact property value and may be rejected by planning authorities in conservation areas or on listed buildings. A timber parting bead is a serviceable part, designed to be replaced every few decades as part of the window’s lifecycle. It is a fundamental part of the window’s character and function.
The professional approach, as highlighted by experts in the field, involves machining the original components to hide the draught seals. As Brian Turner, editor of Homebuilding & Renovating, explains:
Professional systems use draught seals that are machined and rebated into the original sashes. Parting beads and staff beads are then replaced with a like-for-like mould that has a draught seal hidden and pre-installed. Brush pile is inserted into all perimeters of your sash window to achieve a complete seal.
– Brian Turner, Homebuilding & Renovating
This table summarises the key differences for homeowners considering their options.
| Feature | Timber Beads | Plastic (uPVC) Beads |
|---|---|---|
| Moisture Management | Breathes with frame, prevents rot | Can trap moisture against original frame |
| Property Value Impact | Maintains period character | Can devalue period properties |
| Planning Permission | Generally approved in conservation areas | Often rejected in conservation areas |
| Maintenance | Serviceable part, designed for replacement | Lower maintenance but can cause frame damage |
The Painting Error That Glues Your Draught Strips Shut Forever
After meticulously installing high-performance draught-proofing, the single most common and heartbreaking error is to have it all rendered useless by a coat of paint. Standard gloss or vinyl-based paints are notorious for creating a sticky film that effectively glues the moving parts of a window shut. When applied too thickly over brush piles or compression seals, the paint seeps into the filaments and hardens, turning a flexible seal into a solid, useless block. Worse, it can weld the top sash to the bottom sash at the meeting rail, or the sashes to the frame.
Preventing this requires a restorer’s discipline. The choice of paint is critical. Opt for a high-quality, flexible, water-based eggshell or satinwood finish. These paints are more forgiving and less prone to creating the hard, sticky film of traditional gloss. The application technique is just as important. Never allow paint to build up over the draught seals. The goal is to colour the timber, not to encase the entire mechanism in a plastic-like shell.
The ultimate goal is to preserve both function and beauty, as seen in this restored Edwardian bay. A successful paint job should be invisible in its effect on the window’s operation. To avoid the dreaded painted-shut window, follow a strict process during and after painting.
Your Action Plan: Preventing a Painted-Shut Disaster
- Choose the Right Materials: Select durable weatherstrips designed for longevity. Brush pile weatherstripping is proven to be most effective for excluding draughts and resisting paint damage.
- Perform Paint Rescue with Care: If a window is already painted shut, use a fine-bladed glazing knife or a fresh Stanley blade to carefully cut the paint film along the seam. Work slowly to avoid destroying the brush pile underneath.
- Select the Correct Finish: Always use flexible, modern water-based eggshell or satinwood finishes. Avoid thick, inflexible standard gloss or vinyl paints which are the primary culprits.
- Conduct the Post-Painting Ritual: This is non-negotiable. Before the final coat has fully hardened, methodically move both sashes up and down several times to break any forming paint seal between the moving parts.
- Plan for Integration: After a full restoration, ensure the final paint job is part of the plan, not an afterthought. A perfect seal is worthless if it’s immediately glued solid.
When to Replace Cotton Cords with Nylon for Smoother Operation?
The answer, from a purist restorer’s perspective, is almost never. The sash cords are the lifeblood of the window’s balanced system. When they fray or snap, it’s tempting to reach for a modern, synthetic rope like nylon, assuming it will be stronger and more durable. This is a common misconception. While nylon is strong, it is not the correct material for this application. Its primary flaw is that it stretches over time under load. This means that a perfectly balanced window will slowly go out of balance as the nylon cords elongate, causing the sashes to drop or become difficult to move.
Furthermore, synthetic ropes do not hold up well to the constant, minor abrasion and UV exposure they experience within the sash box. The traditional and superior choice is a high-quality, pre-stretched cotton cord. Brands like Samson Spot Cord have been the industry standard for over a century for a reason: they are incredibly durable, with a lifespan that can exceed 60 years. For the UK climate, a waxed, braided cotton cord offers excellent resistance to moisture and ensures smooth, silent passage over the pulleys.
The best time to replace cords is when the sashes are already removed for other work, like painting or installing draught seals. This is the “While You’re In There” principle. Replacing both cords on a sash at the same time, even if only one has failed, is always best practice. Critically, you must match the cord’s thickness to the weight of the sash and the size of the pulley groove for optimal performance. Using a cord that is too thin will cause premature wear, while one that is too thick will jam the pulley. This is not just a repair; it’s a recalibration of the window’s engine.
How to Restore Original Shutters to Act as Effective Thermal Barriers?
In the conversation about window efficiency, original timber shutters are often overlooked, dismissed as a purely decorative feature. This is a significant mistake. These shutters were originally designed as an integral part of a pre-central-heating home’s thermal management system. When closed at night, a well-fitting set of solid timber shutters creates a large, insulating pocket of still air between the shutter and the cold glass. This simple mechanism is remarkably effective.
Research conducted by Historic Environment Scotland confirms this, showing that a set of timber shutters in good condition can reduce heat loss through a single-glazed window by 51%. This is a far greater improvement than can be achieved with even the thickest curtains, which typically reduce heat loss by around 14%. The key is a snug fit. If your shutters are warped, have gaps, or don’t close properly, their thermal performance is severely compromised. Having them restored—easing and adjusting the fit, repairing any damage, and installing proper fastenings—can bring them back to their full potential.
Case Study: Activating Shutters for Thermal Performance
Using original shutters is one of the most effective ways to reduce heat loss at night in a period property. Unlike modern glazing, single-glazed windows allow for greater solar gain during the day, warming the room. The shutters’ job is to trap that warmth inside overnight. A study by heritage experts demonstrated that well-maintained timber shutters can cut heat loss by more than half. If your home’s original shutters have been removed, it is worth commissioning a joiner to make new, solid-panel shutters that match the period style. This single, authentic addition can have a greater impact on your comfort and heating bills than many more modern interventions.
By viewing your shutters not as furniture, but as a dynamic part of the window’s thermal barrier, you unlock a powerful, existing tool for energy conservation that is perfectly in keeping with the character of your home.
How to Draught-Proof Your Front Door for Under £50 Before Winter Arrives?
The same principles of sealing gaps and preventing heat loss apply to the front door, often the single largest source of draughts in a period home. Unlike windows, draught-proofing a door can be an extremely effective and low-cost DIY project. You can make a dramatic improvement to your home’s comfort for less than the cost of a takeaway for two. The key is to systematically address the four main culprits: the letterbox, the keyhole, the frame, and the gap at the bottom.
A comprehensive kit of materials can be assembled for under £50. Start with the letterbox; an unsealed one is essentially a permanent hole in your door. A high-quality replacement with an internal and external flap and a double brush seal can be bought for around £15-£20. Next, add a simple pivoting keyhole cover (£5-£10). For the frame, you can use simple self-adhesive rubber or brush seals, but for a more durable and effective solution, morticed-in seals that sit within a groove in the frame are superior and cost around £10-£15 for a kit. Finally, address the gap at the bottom with a low-profile weather bar or threshold seal (£10-£15). The cumulative effect of these small changes is significant, often saving more than their cost in the first winter alone. According to one analysis, professional draught-proofing can lower heating bills by approximately £50 per year.

Your action plan is a simple shopping list that targets each source of air leakage:
- Letterbox: Install a high-quality letterbox with a double brush seal.
- Keyhole: Fit a simple, decorative escutcheon with a cover.
- Frame Perimeter: Route a groove for a compression seal or, for a simpler fix, apply high-quality adhesive brush strips.
- Under-Door Gap: Fit a low-profile weather bar or an automatic threshold seal.
Tackling these points is a satisfying and highly effective weekend project that will make your hallway noticeably warmer before the cold weather sets in.
Key Takeaways
- Your sash window is a balanced mechanical system; rattles and drops are signs of imbalance, not terminal failure.
- Sympathetic restoration using correct materials (timber beads, cotton cords) preserves character and adds more value than uPVC replacement.
- Modern, hidden draught-proofing like retrofitted brush piles can drastically improve thermal and acoustic performance without altering the window’s appearance.
Why Is Secondary Glazing Often Better Than Double Glazing for Noise Reduction?
When draught-proofing isn’t enough, many homeowners assume the next logical step is full double-glazing. For period properties, especially those that are listed or in a conservation area, this is often the wrong choice. Double-glazing requires replacing the entire sash, permanently altering the historic fabric of the building and often failing to deliver the expected acoustic performance. A frequently superior alternative is secondary glazing.
Secondary glazing involves installing a discreet, second internal window pane inside the existing window reveal. Its primary advantage is in noise reduction. The effectiveness of glazing at blocking sound is largely determined by the air gap between the panes of glass. The wider the gap, the better the performance. Secondary glazing allows for a very wide air gap (typically 100-200mm), which is far more effective at dampening low-frequency noise like traffic than the narrow 12-20mm gap found in standard double-glazed units. As a result, it is not uncommon for secondary glazing to achieve a noise reduction of up to 80%, compared to 30-40% for typical double glazing.
From a conservation perspective, it is a fully reversible intervention that leaves the original, historic window untouched. It is therefore almost always approved by planning authorities. While it may not offer quite the same level of thermal insulation as the very best double-glazing, the improvement is still substantial, and the acoustic and conservation benefits often make it the most intelligent choice.
As this comparative analysis shows, secondary glazing presents a compelling case for period homeowners in the UK.
| Feature | Secondary Glazing | Double Glazing |
|---|---|---|
| Noise Reduction | Up to 80% reduction | 30-40% reduction |
| Thermal Improvement | Up to 60% better insulation | 50-70% better insulation |
| Annual Heating Savings | Up to £150 | £140-200 |
| Installation Cost | £220-400 per window | £500-2000 per window |
| Listed Building Compliance | Generally approved | Often restricted |
As a detailed analysis from MyJobQuote UK confirms, “Secondary glazing can reduce noise by up to 80% and enhance thermal insulation by up to 60%, almost as much as a good double-glazed window, often reducing annual heating costs by up to £150 for a typical home”. This makes it a powerful, practical, and preservation-friendly upgrade.
By approaching your windows with the care of a restorer, you are not just fixing a problem; you are preserving a piece of architectural history and significantly enhancing the comfort and efficiency of your home. Start with a single window, follow these principles with care, and you will see that restoration is not only possible but also deeply rewarding.