
That persistent chill you feel coming through the floorboards isn’t just a simple gap-filling problem. The real solution lies in understanding and managing the entire sub-floor ecosystem. This guide reveals how to strategically seal your floors to eliminate cold draughts without trapping moisture, which could lead to timber rot. It’s about working with your home’s natural ventilation, not against it, for a warmer, healthier living space.
There’s a unique discomfort known to anyone living in a house with suspended timber floors: that persistent, ankle-biting chill that seems to rise from the ground up, even when the heating is on. You feel it through the carpet, a constant reminder of the “wind tunnel” operating beneath your feet. The common response is to reach for thick rugs or run a bead of generic silicone sealant along every visible gap, hoping to plug the leak. While these measures offer temporary relief, they often miss the fundamental point.
The space under your floor isn’t a dead void; it’s a dynamic, breathing ecosystem designed to keep your timber joists dry and healthy. Tackling draughts without appreciating this fact is a recipe for disaster. Simply blocking every opening can create a moisture trap, turning a draught problem into a far more serious structural issue of damp and rot. The ingenious approach, and the one we will explore, isn’t about total warfare on airflow. It’s about strategic management.
This article will guide you through the specialist’s mindset. We will dissect the vital role of ventilation, evaluate modern and traditional sealing methods for their impact on timber health, and show you how to choose materials that insulate while still allowing your floor to “breathe”. By the end, you will understand how to solve the draught problem for good, creating a warmer home that is also structurally sound, all without the disruptive and costly process of lifting your floorboards.
To navigate this complex topic, this guide is structured to build your understanding step-by-step. We will cover everything from the critical function of air bricks to the surprising connection between your loft and your cold floors. The following summary outlines the key areas we will explore.
Summary: A Specialist’s Guide to Eliminating Floor Draughts
- Why Blocking Air Bricks to Stop Draughts Is a Fatal Error for Joists?
- Is Under-Floor Spray Foam via Robots Safe for Timber Health?
- Wood Slivers or Mastic: Which Looks Better on Exposed Floorboards?
- The Insulation Netting Mistake That Rots Your Floor Structure
- Which Carpet Underlay Provides the Best Insulation for Cold Floors?
- How to Seal Draughty Floorboards in a Victorian Hallway Without Lifting Them?
- How to Pass the Air Tightness Test on Your First Attempt?
- Why Is Compressing Your Loft Insulation Reducing Its Efficiency by 50%?
Why Blocking Air Bricks to Stop Draughts Is a Fatal Error for Joists?
The first instinct when feeling a draught is to find the source and block it. Often, the terracotta air bricks dotted around the base of your home are prime suspects. However, blocking these is a catastrophic mistake. These vents are not a design flaw; they are the essential lungs of your sub-floor ecosystem. Their job is to create a steady cross-flow of air that removes moisture emanating from the ground, keeping the timber joists that support your entire floor dry and free from fungal attack. Without this ventilation, the humidity under your floor rises, creating the perfect breeding ground for wet and dry rot.
The draught you feel isn’t caused by the air bricks themselves, but by the unsealed gaps in the floorboards above them, which allow this cold, circulating air into your living space. The goal is to stop this upward leakage, not to halt the vital sub-floor ventilation. A draughty floor can be expensive; studies suggest that draught-proofing floors and skirting could save around £85 per year on energy bills. The key is to achieve these savings without compromising the structural integrity of your home. Before you seal anything, you must first assess if your existing ventilation is even adequate.
Your 5-Step Sub-Floor Ventilation Check
- Locate and Inspect: Find all air bricks around your home’s external walls below floor level. Ensure they are clear of soil, vegetation, and other obstructions.
- Test the Airflow: On a breezy day, use a smoke pencil or an incense stick near an air brick. The smoke should be visibly drawn into or pushed out of the vent, indicating active airflow.
- Follow Your Nose: Check for persistent musty or damp smells in ground-floor rooms. This is a classic sign of poor sub-floor ventilation and potential moisture issues.
- Visual Inspection: Use a torch to look through the air bricks at the brickwork inside. White, salty deposits (efflorescence) or green/black growth are red flags for excessive moisture.
- Check for Timber Health: If you have an access hatch, look at the joists. Any signs of dark staining, softening wood, or visible fungal growth require immediate professional attention.
This simple diagnosis helps you understand the health of your sub-floor. If ventilation is poor, you must address that first by clearing or adding air bricks before tackling the draughts above.
Is Under-Floor Spray Foam via Robots Safe for Timber Health?
In the quest for a quick fix, modern technology offers a seemingly perfect solution: robotic spray foam insulation. Companies like Q-Bot use remote-controlled vehicles to apply expanding foam to the underside of floorboards, promising high insulation values with no disruption. While ingenious, this method comes with a significant health warning for the timber in period homes. Most spray foams create a closed-cell, non-breathable barrier. When applied directly to timber, this can trap any existing or future moisture, effectively suffocating the wood and accelerating decay.
This is especially dangerous if the sub-floor ventilation is not perfect or if small plumbing leaks occur. The foam hides the problem, preventing the timber from drying out naturally. Think of your floor joists like the chimney in an old house. As Historic England wisely points out in their guidance, “Chimneys need some ventilation to prevent a build-up of dampness.” The same principle applies directly to the timber structure beneath your feet. A ‘breathing floor’ construction requires ‘breathing’ insulation solutions.
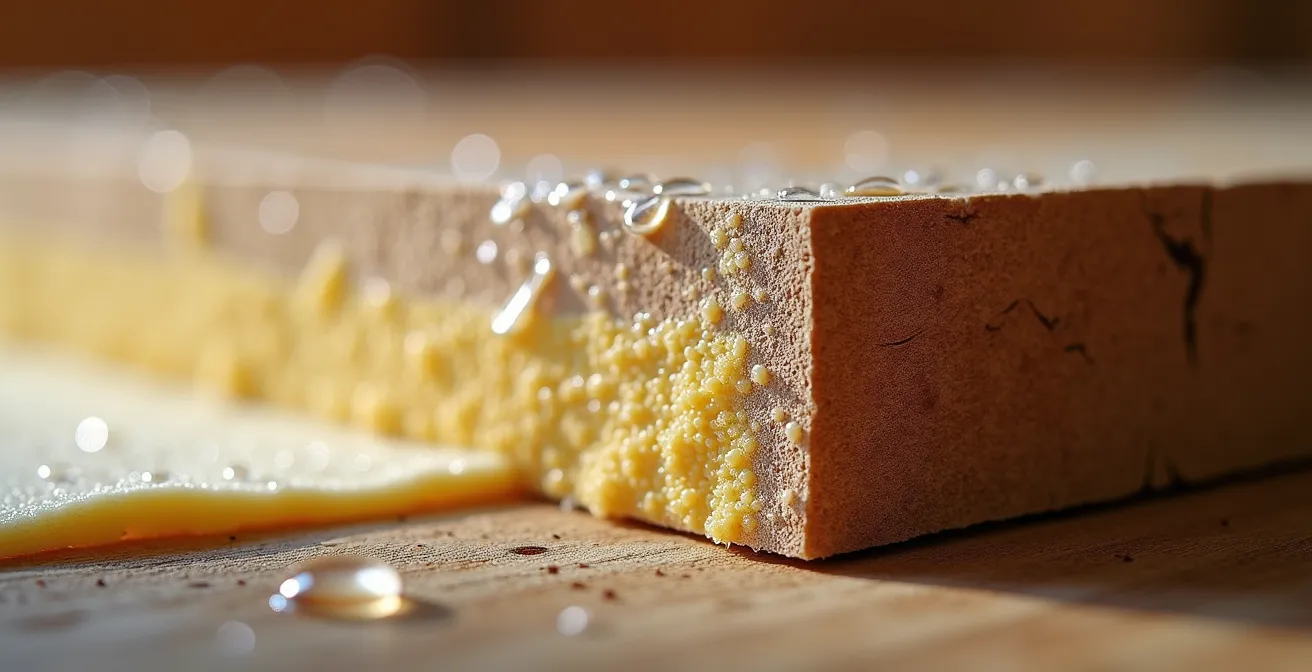
The image above illustrates the risk perfectly. The intimate contact between the foam and the wood creates a micro-environment where condensation can form and become trapped. While some open-cell, breathable spray foams exist, their application must be flawless. For owners of Victorian or Edwardian properties, the risk of getting it wrong often outweighs the convenience. Preferring materials that work in harmony with the original construction is a much safer long-term strategy.
Wood Slivers or Mastic: Which Looks Better on Exposed Floorboards?
For homes with beautiful, exposed floorboards, sealing the gaps is a delicate balance between thermal performance and aesthetics. The two most common methods, flexible mastic and traditional wood slivers, offer vastly different results. Mastic or silicone-based sealants are cheap and easy to apply, but they create a distinct, often shiny line between each board. Over time, as the wood expands and contracts with the seasons, these inflexible fillers tend to crack and pull away, reopening the draughts within a year or two.
The traditional and more craftsmanlike approach is to use pine slivers. These are thin wedges of reclaimed wood, often pine, that are glued and tapped into the gaps. When done correctly, they are sanded flush with the floor and stained to match, becoming virtually invisible. More importantly, they become part of the floor itself, expanding and contracting with the boards and offering a permanent solution. While the initial cost and effort are higher, the result is both aesthetically superior and far more durable, respecting the natural movement of the timber.
This comparative analysis, sourced from a DIY guide on draught-proofing, clearly outlines the trade-offs between common methods.
| Method | Initial Cost | Longevity | Appearance | Flexibility |
|---|---|---|---|---|
| Pine Slivers | Higher (materials + labor) | Permanent – moves with wood | Invisible when matched/stained | Excellent – expands/contracts |
| Silicone Mastic | Low (£5-10 per tube) | 1-2 years before cracking | Visible lines between boards | Poor – cracks with movement |
| DraughtEx Strips | Medium (£40-60 per room) | 5-10 years | Dark shadow effect | Good – compresses/expands |
| Mass Filler (sawdust + PVA) | Very low (DIY) | 2-3 years | Can be color-matched | Moderate – may crack |
The financial incentive is also clear. Sealing the gaps in a single room can lead to savings of around £40 per year. Choosing a method like pine slivers ensures that this is a one-time investment, not a recurring annual task.
The Insulation Netting Mistake That Rots Your Floor Structure
When insulating a suspended floor from below (if access is possible), a common DIY approach is to stuff mineral wool batts between the joists and hold them in place with simple garden or plastic netting. This method is fraught with danger. Mineral wool can absorb moisture, and if it sags and touches the damp ground below, it will act like a sponge, wicking moisture up towards your precious timber joists. Furthermore, standard plastic netting can trap condensation against the wood, creating another localised moisture problem.
The professional and ingenious solution involves a two-part system that both insulates and manages moisture. First, the mineral wool insulation should be held firmly against the underside of the floorboards. Second, and most critically, a vapour-permeable membrane (also known as a breathable membrane) should be fixed to the underside of the joists. This specialist material has a crucial property: it allows water vapour to pass through it, away from the timber, but prevents liquid water and cold air from getting in. This ensures the entire floor structure can continue to “breathe”.
As the Energy Saving Trust highlights, using the wrong materials can have dire consequences. Their guidance warns that materials like plasterboard, when used to hold insulation, “can trap moisture if the joists are not fully dry or if ventilation is inadequate, potentially causing damp, mould, and timber decay.” The principle is clear: any material added to the sub-floor must not compromise its ability to shed moisture. Investing in a breathable membrane is a small cost that provides huge protection for the long-term health of your home’s structure.
Which Carpet Underlay Provides the Best Insulation for Cold Floors?
For the millions of UK homes with carpeted floors, the underlay is the most important and yet most overlooked component in the fight against draughts. Many people assume any thick underlay will do the job, but the material itself makes a world of difference. The thermal resistance of underlay is measured in ‘TOG’ – the higher the TOG rating, the better it is at stopping heat from escaping. A standard, cheap PU foam underlay might have a TOG of 2.0, while a high-performance insulating underlay can exceed 3.0.
However, for a suspended timber floor, insulation is only half the story. The other half is breathability. A non-breathable underlay (like rubber) can trap moisture rising from below, contributing to a damp, musty smell and potentially damaging the floorboards you can’t see. This is where traditional materials make a triumphant return. Wool felt underlay, for example, offers an exceptional combination of high TOG ratings (often up to 3.6) and natural breathability. It insulates effectively while allowing water vapour to pass through, working in harmony with the “breathing floor” construction of a period property.
| Material Type | TOG Rating Range | Best Use Case | Durability | Sustainability |
|---|---|---|---|---|
| Wool Felt | 1.2 – 3.6 | Maximum insulation, heritage properties | Excellent – natural resilience | Natural, breathable, recyclable |
| PU Foam | 2.0 – 3.1 | General comfort, good insulation | Good – varies by density | Often recycled content |
| Crumb Rubber | 1.5 – 2.5 | High traffic areas, stairs | Excellent – high density | Recycled tyres |
| Fibreboard | 0.35 – 1.0 | Underfloor heating systems | Good – stable | Moderate |
When your carpet is next due for replacement, upgrading to a high-TOG, breathable underlay is one of the most effective, non-disruptive ways to add a significant layer of insulation. It’s the final barrier that turns a cold, draughty floor into a comfortable surface.
How to Seal Draughty Floorboards in a Victorian Hallway Without Lifting Them?
The Victorian hallway is often the epicentre of the draught problem, with its multiple doorways and long, exposed floorboard runs. Sealing it effectively without lifting the boards requires a methodical, multi-pronged attack. This is where we apply the principle of strategic sealing: using the right material in the right place. Before starting, the most crucial step is to thoroughly clean all the gaps. Decades of dust and debris will prevent any sealant from adhering properly. Use a vacuum cleaner with a crevice tool, or even a can of compressed air, to blow the gaps clean.

Once clean, you can select your weapon of choice based on the gap size. For small, consistent gaps under 5mm, a flexible V-shaped strip like DraughtEx can be simply pushed into the gap with an applicator tool. For the crucial junction between the floorboards and the skirting boards—a major source of draughts—a flexible decorator’s caulk applied with a mastic gun is ideal. As experts in home energy efficiency advise, this flexibility is non-negotiable, as this joint sees constant movement. For wider, more irregular gaps between boards, traditional pine slivers are the superior, permanent solution. They are cut to size, coated in wood glue, and tapped in place for a seamless finish.
Finally, don’t forget the vertical draughts. Gaps around radiator pipes coming up through the floor are notorious culprits. These can be easily sealed with a small amount of expanding foam or, for a neater finish, purpose-made pipe collars. By combining these methods, you create a comprehensive seal that respects the floor’s need to move while drastically reducing cold air infiltration, transforming your hallway from a wind tunnel into a welcoming entrance.
Key Takeaways
- Ventilation is Non-Negotiable: Your sub-floor must breathe. Never block air bricks; the goal is to stop air from leaking upwards into rooms, not to stop airflow underneath the joists.
- Choose Breathable Materials: Whether it’s insulation, gap-fillers, or underlay, always select materials (like vapour-permeable membranes, pine slivers, and wool felt) that allow moisture to escape, preventing rot.
- It’s a Whole-House System: Floor draughts are often a symptom of the ‘stack effect’. Cold air is actively pulled in at the bottom of the house because warm air is escaping from the top, typically through the loft.
How to Pass the Air Tightness Test on Your First Attempt?
Moving beyond simple comfort, effective draught-proofing is a legal requirement for new builds and major renovations under UK Building Regulations. An air tightness test (or air pressure test) measures the level of uncontrolled air leakage from a building. A fan is mounted in an external doorway to pressurise the house, and the rate at which the air escapes is measured. Floors are a primary area of failure. Passing this test on the first attempt saves time and money, and the principles are directly applicable to improving any existing home.
To ensure a pass, an inspector will be looking for a systematic approach to sealing. This includes not just the obvious gaps between floorboards but all the secondary weak points. Gaps between skirting boards and the floor must be sealed with flexible caulk. All service penetrations—where pipes and cables pass through the floor—must be sealed with appropriate grommets or mastic. The junctions where suspended floors meet solid floors, and where they run underneath bay windows, are also critical areas that need careful attention.
Successfully sealing the ground floor is a huge step towards achieving a good air tightness score. It demonstrates a holistic understanding of the building envelope. It’s about transitioning from random gap-plugging to a methodical process of identifying and sealing every unintended air path, turning your home from a leaky sieve into a well-controlled, energy-efficient environment. The same checklist used by professionals before a test is a perfect audit for any homeowner serious about eliminating draughts.
Why Is Compressing Your Loft Insulation Reducing Its Efficiency by 50%?
It may seem strange to end an article about floors by talking about the loft, but here lies the master key to understanding why your floor draughts are so stubbornly persistent. The phenomenon at play is the “Stack Effect.” In winter, the warm, buoyant air inside your house rises. If your loft and roof are not perfectly sealed, this air escapes at the top. This creates a gentle, continuous negative pressure at the bottom of the house, which actively sucks cold air in from the outside through any available gap—chiefly, your floorboards.
This makes your floor draughts a symptom of a whole-house problem. You can seal your floor perfectly, but if your loft is leaky, the house will still try to suck air in from somewhere else. This is where loft insulation comes in. Its efficiency comes from the air trapped between its fibres. When you compress it—by squashing it to fit into joists or by piling storage boxes on top—you squeeze this air out, drastically reducing its insulating value by as much as 50%. A poorly insulated loft accelerates the stack effect, which in turn increases the pull on your floorboards.
The most ingenious approach to a warm home is therefore a two-pronged attack: seal the bottom and seal the top. Ensure your loft insulation is laid correctly, with a base layer between the joists and a second, perpendicular layer on top, with no compression. A thermal imaging survey can be revelatory, as it provides a clear visual map of this effect, showing cold air being pulled in at the floor and heat hemorrhaging from the roof. By addressing both ends of the stack effect, you don’t just reduce the draught; you calm the entire airflow system within your home.
By adopting this specialist’s view—seeing your home as an interconnected system—you can finally win the war against cold floors, creating a home that is not only warmer and more efficient but also healthier for the long term. The next logical step is to begin your own diagnostic survey and formulate a strategic plan of action.