Doubling your allotment yield isn’t about working harder; it’s about engineering a smarter, closed-loop system for your soil, nutrients, and space.
- Master the Carbon-to-Nitrogen ratio in your compost to create a powerful biological engine for fertility.
- Use vertical space and risk-based management instead of following rigid, outdated gardening rules.
Recommendation: Begin by testing your urban soil for contaminants like lead and amending it with the right organic matter for its specific type (e.g., clay vs. loam).
Every allotment holder in England knows the dream: a barrow overflowing with produce, a larder stocked for winter, and the deep satisfaction of self-sufficiency. Yet, despite the back-breaking work of digging, weeding, and watering, the yield from a standard 10-rod plot can often feel underwhelming. We’re told to follow the old wisdom: “make good compost,” “rotate your crops,” and “feed your plants.” While sound, these are just isolated commands in a much larger, interconnected operation.
What if the rigid rules are actually limiting your plot’s potential? What if the key to unlocking abundance lies not in individual tasks, but in understanding the plot as a whole system? This guide throws out the conventional rulebook. We will approach your allotment not as a passive patch of dirt, but as an intensive, high-performance production system. The secret to doubling your harvest isn’t about more effort, but about engineering superior efficiency. It’s about mastering the cycles of soil biology, managing nutrient flow with precision, and exploiting every cubic inch of your space in three dimensions.
For those who prefer a visual start, the video below provides an excellent introduction to the foundational no-dig method, using cardboard and compost to kick-start your soil’s biological engine.
In this article, we will deconstruct this systems-based approach piece by piece. You will learn not just what to do, but why you are doing it—from turning your compost heap into a powerhouse of fertility to implementing advanced feeding strategies that cater to each plant’s specific needs. Prepare to transform your allotment from a hobby garden into a model of productivity.
Contents: A Systems Approach to Maximum Yield
- Is Crop Rotation Still Necessary If You Use No-Dig Methods?
- Which Green Manure Crop Should You Sow in October to Fix Nitrogen?
- Comfrey Tea or Nettle Soup: Which Liquid Feed Boosts Tomatoes Best?
- The Urban Soil Danger: Should You Test Your Allotment for Lead?
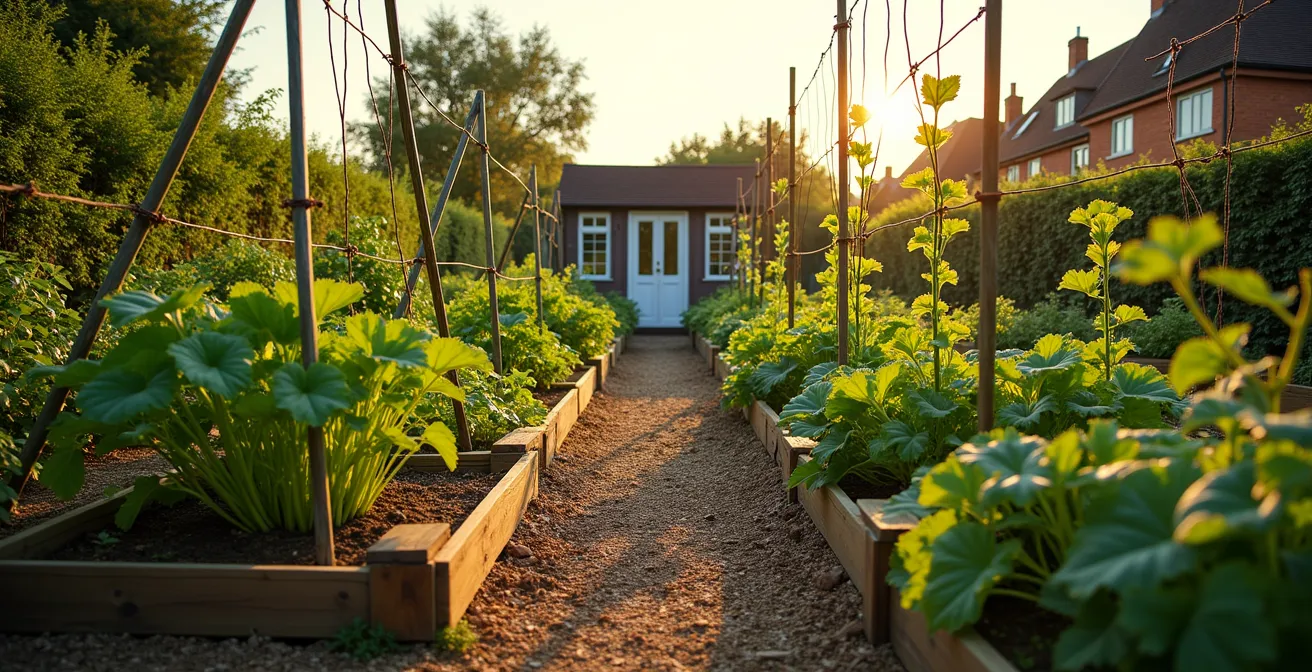
- How to Grow Squash Vertically to Save Ground Space for Roots?
- Why You Need to Add Cardboard to Your Kitchen Scraps to Stop the Rot?
- Mushroom Compost or Manure: Which Is Better for Clay Soil Improvement?
- Why Does Your Compost Bin Smell Like Ammonia and Slime?
Is Crop Rotation Still Necessary If You Use No-Dig Methods?
The rigid four-year crop rotation is often treated as gospel on English allotments. However, for the intensive no-dig grower, its importance diminishes significantly. The core purpose of rotation is to prevent the build-up of soil-borne pests and diseases. By leaving the soil structure undisturbed and mulching annually with compost, you foster a rich, diverse microbiome. This healthy ecosystem naturally suppresses many pathogens, reducing the need for strict rotational practices. In fact, a landmark 11-year trial by no-dig pioneer Charles Dowding demonstrated not only better soil health but also consistently higher yields.
This doesn’t mean you can abandon rotation entirely. Instead, you adopt a more intelligent, risk-based management approach. Rather than rotating everything, you focus only on the families most vulnerable to persistent soil diseases in the UK climate. This frees up your best sunny spots for long-term crops like tomatoes or cucumbers without the annual upheaval.
- High-Risk Brassicas: To prevent clubroot, it’s still wise to rotate cabbages, broccoli, and cauliflower, aiming for a 4-year gap.
- Vulnerable Alliums: Onions, garlic, and leeks should be moved every 3 years to avoid the devastating onion white rot.
- Lower-Risk Families: Potatoes, legumes, and cucurbits can often be grown in the same spot for several years in healthy, compost-rich no-dig soil, provided you monitor for any signs of trouble.
- Biological Rotation: Focus on alternating heavy-feeding crops (like squash) with nitrogen-fixing crops (like beans or a green manure) to manage fertility.
By shifting from a rigid schedule to a flexible, risk-based strategy, you simplify your planning, improve soil health, and keep your most productive ground dedicated to your most valued crops. It’s a prime example of working smarter, not harder.
Which Green Manure Crop Should You Sow in October to Fix Nitrogen?
For the yield-focused grower, bare soil over winter is a wasted opportunity. Sowing a green manure in autumn is a cornerstone of nutrient cycling, acting as a living fertiliser that protects soil structure and fixes atmospheric nitrogen for the hungry crops of spring. For an October sowing in the UK, the two primary candidates are Winter Tares and Field Beans. Your choice depends on your specific timing and the harshness of your local winter.
Winter Tares (or Vetches) germinate and grow rapidly in the autumn, providing excellent ground cover before the first hard frosts. Field Beans are more frost-hardy, growing more slowly but steadily through the winter months. An analysis from the Royal Horticultural Society provides a clear comparison to inform your decision.
| Characteristic | Winter Tares (Vicia sativa) | Field Beans (Vicia faba) |
|---|---|---|
| Best sowing time | Early October | Late Oct/Early Nov |
| Frost hardiness | Moderate (-5°C) | Excellent (-10°C) |
| Growth rate | Rapid autumn growth | Slower but steadier |
| N-fixing capacity | 40-60kg N/ha | 50-80kg N/ha |
| Chop timing | March-April | April-May |
Timing the termination of the green manure is as crucial as choosing the right crop. To maximise the nitrogen available for the following crop, you must chop it down and leave the foliage on the surface as a mulch. According to practical findings from UK allotmenteers, you should do this 3-4 weeks before planting nitrogen-hungry crops like potatoes or courgettes. This period allows soil biology to break down the plant matter, releasing the fixed nitrogen into a form your new plants can readily absorb just as they need it most.
Comfrey Tea or Nettle Soup: Which Liquid Feed Boosts Tomatoes Best?
Standard granular fertilisers provide a blunt instrument for feeding. To truly maximise the yield of heavy-feeding crops like tomatoes, you need a dynamic, two-phase liquid feeding strategy that caters to the plant’s changing needs throughout its life cycle. The two best homemade options, readily available on any UK allotment, are nettle soup and comfrey tea.
The question isn’t which is better, but when to use each. Stinging nettles are rich in nitrogen, which fuels vigorous, leafy growth. Comfrey, particularly the ‘Bocking 14’ variety, is a “dynamic accumulator” of potassium, essential for flower and fruit development. Applying the right feed at the right time is the key to a bumper crop of tomatoes.
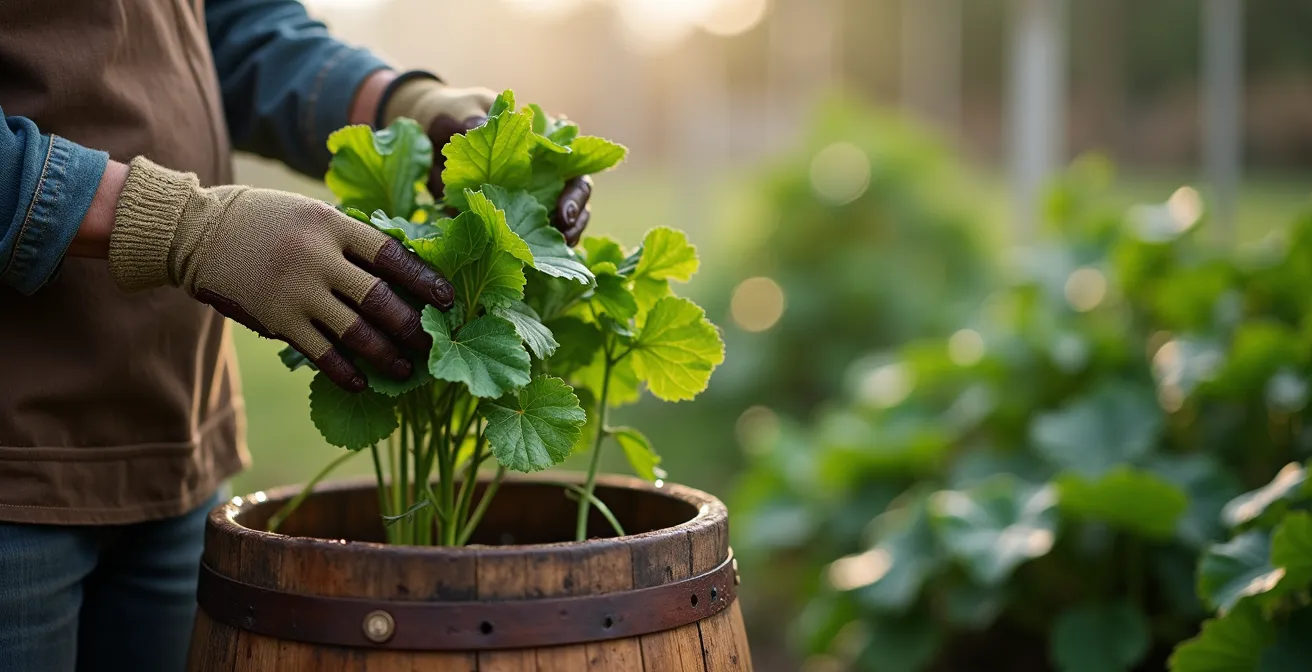
As the image shows, preparing these feeds is a simple, organic process. The strategy involves switching from a nitrogen-rich feed to a potassium-rich one as the plant’s needs evolve.
- Phase 1 (Weeks 1-6): Once plants are established, apply nettle soup weekly. The high nitrogen content will drive the development of a large, healthy plant structure capable of supporting a heavy fruit load.
- Phase 2 (Post-Fruiting): As soon as you see the first truss of flowers begin to set fruit, switch immediately to comfrey tea. The potassium boost will channel the plant’s energy into producing abundant, flavourful tomatoes rather than more leaves.
- Dilution and Frequency: A standard dilution rate for both homemade feeds is 1 part feed to 10 parts water, applied every 10-14 days during the peak growing season from June to September.
This phased approach ensures the plant gets precisely the nutrients it needs, exactly when it needs them, preventing the common problem of lush, leafy tomato plants with very little fruit.
The Urban Soil Danger: Should You Test Your Allotment for Lead?
Before you can build a high-yield system, you must ensure its foundation is safe. For allotments in urban or ex-industrial areas across the UK, there is a hidden danger: heavy metal contamination, particularly lead. Left over from old paint, industrial pollution, or vehicle exhaust from the era of leaded petrol, it can persist in the soil for decades. Worryingly, UK soil surveys indicate that 15-30% of urban plots can exceed safe lead levels for growing vegetables.
Lead is most readily taken up by root vegetables (carrots, parsnips) and leafy greens (lettuce, spinach). Fruiting crops like tomatoes, beans, and squash are the safest to grow as the metal is less likely to accumulate in the fruit. Given the risk, testing your soil is not paranoia; it’s responsible management. If you are on an urban plot, especially one near old buildings or busy roads, a soil test is a wise investment in your family’s health. Services like the James Hutton Institute in Scotland offer affordable and reliable testing.
If your test results come back high (above 300mg/kg), it doesn’t mean you have to abandon your plot. You simply need to implement a clear mitigation strategy to manage the risk effectively.
Your Action Plan for Managing Lead in Allotment Soil
- Assess Your Risk: Determine if your allotment is in a high-risk urban area. If so, invest in a professional soil test (e.g., from the James Hutton Institute, costing around £45-£60 per sample).
- Prioritise Safe Crops: If lead levels are borderline, focus exclusively on growing low-uptake fruiting crops like tomatoes, courgettes, beans, peas, and peppers. Avoid growing root vegetables directly in the soil.
- Bind the Lead: Incorporate large amounts of organic matter, especially high-phosphate compost (look for PAS100 certified green waste compost). Phosphate binds with lead in the soil, making it less available for plant uptake.
- Create a Physical Barrier: For growing high-risk crops like carrots and potatoes, build raised beds. Line the bottom with a geotextile membrane before filling with certified, clean topsoil (compliant with BS 3882:2015 standards).
- Practice Good Hygiene: Always wash all produce thoroughly, peel root vegetables, and remove the outer leaves of leafy greens. Wash your hands after working on the plot and before eating.
How to Grow Squash Vertically to Save Ground Space for Roots?
In a 10-rod plot, ground space is the most valuable currency. To double your yield, you must think in three dimensions. Growing vining crops like squash and pumpkins vertically is one of the most effective ways to achieve superior spatial efficiency. Instead of letting one squash plant sprawl over two square metres of valuable soil, you train it upwards, freeing the ground below for a high-density crop of lettuces, beetroot, or French beans.
The key is choosing the right varieties and providing a strong support structure that can withstand the weight of the fruit and the force of autumn gales. Simple A-frames or arched trellises made from hazel poles, sturdy bamboo, or concrete reinforcement mesh are ideal.
Case Study: A-Frame Success on a UK Allotment
Allotment holders across the UK have reported excellent results growing specific varieties on 8ft A-frame structures. The ‘Tromboncino’ summer squash and ‘Uchiki Kuri’ winter squash are standout performers. Their manageable fruit size (around 1-2kg) is perfect for vertical growing, and they are vigorous enough to cover the structure quickly. When secured with jute netting, these structures have proven resilient enough to support a heavy crop through to the autumn harvest.
Not all squash are suitable for climbing. Varieties that produce enormous fruits are best left to ramble on the ground. The ideal vertical squash produces numerous smaller fruits. The table below highlights some of the best-performing varieties for UK conditions.

| Variety | Type | Fruit Weight | Days to Maturity | Support Needed |
|---|---|---|---|---|
| Tromboncino | Summer | 0.5-1kg | 60-70 | Light support |
| Uchiki Kuri | Winter | 1-1.5kg | 85-95 | Strong slings for fruit |
| Honeyboat | Winter | 0.8-1.2kg | 90-100 | Moderate support |
| Sweet Dumpling | Winter | 0.3-0.5kg | 80-90 | Minimal support |
Why You Need to Add Cardboard to Your Kitchen Scraps to Stop the Rot?
Your compost bin is not a waste disposal unit; it is the biological engine of your entire allotment system. To make it run efficiently and produce the rich, crumbly ‘black gold’ that fuels high yields, you must provide it with a balanced diet. The most common failure in home composting is an imbalanced Carbon-to-Nitrogen (C:N) ratio. Kitchen scraps, grass clippings, and soft green weeds are all high in nitrogen (“Greens”). When added alone, they create a dense, wet, airless mass that begins to rot anaerobically, leading to slime and foul smells.
The solution is simple: for every bucket of nitrogen-rich greens you add, you must add an equal volume of carbon-rich “Browns”. Carbon provides the energy for the microorganisms and creates air pockets, preventing compaction and ensuring an aerobic process. The easiest and most abundant source of carbon for most households is plain brown cardboard.
By layering greens and browns, you are building a perfect habitat for the bacteria and fungi that do the hard work of decomposition. Think of it as making a lasagne: a layer of kitchen scraps, followed by a layer of torn-up cardboard, and so on. This simple discipline is the single most important factor in successful composting.
- Amazon/Delivery Boxes: An endless supply. Tear them into pieces roughly 10cm square. Always remove plastic tape and labels first.
- Toilet Roll Tubes: These are perfect. Add them whole or torn; they break down quickly.
- Egg Cartons: Cardboard egg cartons are excellent for absorbing excess moisture from very wet kitchen scraps. Rip them into quarters.
- Shredded Paper: Shredded confidential mail or newspaper works well, but avoid glossy magazines or coated paper.
Keeping a pile of torn-up cardboard next to your compost bin makes it easy to maintain this balance. It’s a non-negotiable habit for anyone serious about producing high-quality compost at speed.
Mushroom Compost or Manure: Which Is Better for Clay Soil Improvement?
Improving the structure of heavy clay soil is a primary goal for many UK allotmenteers. Clay is nutrient-rich but suffers from poor drainage and compaction. Adding organic matter is the answer, but the two most common choices—well-rotted manure and spent mushroom compost—have very different properties and should be used strategically.
Well-rotted manure is a fantastic all-rounder. It’s rich in a balanced range of nutrients (NPK) and introduces a huge diversity of microbial life, which helps to break up the clay and form stable soil aggregates. Spent mushroom compost is a less potent fertiliser but an exceptional soil conditioner. Its fine, uniform texture is superb for improving aeration and water retention. However, it is typically alkaline (pH 7.5-8) due to the chalk used in its production, and it can have a high salt content.
A comparison of these amendments for English conditions reveals that a combined approach is often best.
| Amendment | pH Effect | Structure Improvement | Nutrient Content | Best Application |
|---|---|---|---|---|
| Well-rotted manure | Slightly acidic | Good | High NPK | Autumn incorporation/mulch |
| Mushroom compost | Alkaline (pH 7.5-8) | Excellent | Moderate, high calcium | Spring mulch |
Rather than choosing one over the other, the intensive gardener employs a “best of both worlds” strategy, applying them at different times of the year to maximise their respective benefits. A proven strategy outlined by UK gardening advisors is a dual-application method.
- Autumn Application: Apply a thick 5-7cm layer of well-rotted manure as a winter mulch. This allows winter worms and weather to begin incorporating it, feeding the soil biology over the dormant months.
- Spring Application: Apply a finer 2.5-5cm layer of mushroom compost as a top-dressing or mulch in spring. This provides an excellent tilth for sowing seeds and its alkaline nature can help prevent clubroot in brassicas, which prefer a higher pH.
- Important Caveat: Never use mushroom compost around acid-loving plants like potatoes, rhubarb, or blueberries.
Key Takeaways
- Your compost is a biological engine; manage its Carbon-to-Nitrogen ratio meticulously with cardboard (‘browns’).
- Adopt a risk-based approach to crop rotation in no-dig systems, focusing only on high-risk plant families.
- Maximise yield by thinking in 3D: use vertical structures for climbers like squash to free up ground space for other crops.
Why Does Your Compost Bin Smell Like Ammonia and Slime?
A foul-smelling compost bin is more than just unpleasant; it’s a clear signal that your biological engine has stalled. The two most common bad smells—ammonia and rotten eggs—point to a specific and easily correctable imbalance, usually a catastrophic failure in the Carbon-to-Nitrogen ratio. Understanding these symptoms allows for a rapid diagnosis and fix, getting your system back to peak performance.
An overwhelming smell of ammonia indicates a massive excess of nitrogen (‘Greens’). This commonly happens in spring after adding the first few batches of lush grass clippings to the bin. The nitrogen has no carbon to bond with, so it off-gasses as ammonia. A slimy texture and a rotten egg smell (hydrogen sulfide) signals that the pile has gone anaerobic. It’s too wet, too compacted, and lacks the oxygen that beneficial microbes need to survive. This is common after a period of heavy English rain on an uncovered pile.
The solution in both cases is to immediately re-balance the C:N ratio and reintroduce air. This is compost first aid.
- For Ammonia Smell (Too much Nitrogen): The immediate fix is a massive infusion of carbon. Fork in a large quantity of “Browns”—a bucket of shredded cardboard, dry autumn leaves, or, most effectively, half a bale of straw. Mix it in thoroughly.
- For Slime/Rotten Egg Smell (Anaerobic): The pile needs air and dry material. First, use a garden fork to turn the entire pile over, lifting and fluffing it to create air pockets. Then, mix in a large volume of dry browns like woodchip or torn-up egg boxes to absorb the excess moisture.
Prevention is better than cure. Keep a covered bale of straw or a bin of pre-shredded cardboard next to your composter. Every time you add a bucket of kitchen scraps, add a matching handful of browns. This simple discipline will prevent 99% of compost problems and keep your system’s engine running smoothly.
By shifting your perspective from performing isolated tasks to managing an interconnected system, you unlock the true productive potential of your plot. Start today by assessing the foundation of your system—your soil and your compost—and begin implementing these strategies to drive your allotment towards unprecedented yields.